Showing posts with label how to. Show all posts

Thursday, September 20, 2012

Capturing Fall Colors

Summer has officially come to an end. And as much as I am sad that it went by so quickly, I do love the warm, vibrant colors of autumn and the rich spicy smells of pies baking and pumpkin lattes brewing! I also love the gorgeous landscapes and photographic opportunities waiting just outside my door. Today I'm sharing a few simple tips on capturing those vibrant fall colors in your photos.


1. Any day is a good day to shoot. Don't put your camera away when it's overcast or rainy. Those cloudy skies act like a giant softbox and can be great times to shoot, especially since full sun can result in colors that appear less saturated. And those rainy days are great too. The wetness and clouds can create a dramatic mood in your images. Raindrops can also create great reflections and add interest.

2. On sunny days, shoot with the sun to your back. Shooting into the sun will create haze, lower saturation and can result in dark shadows and a loss of detail.

3. Adjust your white balance. Check your settings and try different things to see what you get. You may like the result of a warmer image if you try increasing your kelvin number slightly or using the cloudy setting. Some DSLR's have mode settings for landscapes or vibrant subjects. On my Nikon there is a setting for "vivid." Check your manual if you are unsure how to change this.

4. Try underexposing just a bit. You'll up your saturation that way, watch your shadows though.

5. Look for contrasting colors to make them pop. Golden leaves against a blue sky are gorgeous! Play with different color combinations by moving around to get different angles and compositions.

6. Go wide and get close. Sometimes you want a wide sweeping shot to take in a whole forest of trees, but getting close with tiny details on leaves, bark, acorns, etc. can showcase beautiful colors and patterns as well.

7. Keep an eye out for reflections.  That gorgeous tapestry of leaves will reflect beautifully in calm waters. Lakes, rivers, even puddles work.


These are just a few simple tips to get you started.
What's your favorite way to capture the colors of fall?


Wednesday, September 12, 2012

The Importance of Insurance

Pin It
Take a look at this image below.  These are the most expensive items in my camera bag.  It obviously doesn't include things like tripods, props & all the little things that go along with this hobby that seems to always have a wish list attached to it. 


insurance for your gear
Now imagine that you have all these things in your camera bag.  It's sitting on the passenger seat of your vehicle. You get out- walk around- open the door & the bag tips over & all these things dump out on to the parking garage floor.  How do you feel??  I know how I felt when it happened to me. My heart raced & then fell into the pit of my stomach.  I felt physically ill & was then in tears until I could get up to the hotel room & try out all my gear to make sure it was still in working order. By the grace of God it was all good. 

Or think of this.  You are setting up for a photo shoot with some kids.  You have your bag- full of all these things sitting on the grass & you are watching the kids as you are setting up your tripod.  You turn back around- and your bag & all your expensive equipment is gone.  Someone swiped it.  Devastating right???  This happened to my friend Kim & when she told me- it sent a panic though my veins. Then she tells me that she has insurance & all will be okay. 

So of course I inquire about this insurance because when I first started my little collection in my bag I knew that I would have a hard time replacing it if something happened to it.  I was originally told by my insurance that all they could offer me was that it was covered under my renter's policy.  If there was a fire or theft- in the house- it would be covered. It wouldn't cover anything else.  So Kim told me that she bought her policy through Shelter Insurance.  I visited the website & found that the kind I was looking for is called Personal Property Insurance or more often called Inland Marine Insurance.  Basically any personal property that can be transported anywhere in the world fits into this category.  

When I talked to them though they kept trying to get me to buy a renter's policy from them & insisted that it would be covered under that.  I realize that they don't make a whole lot from an Inland Marine policy so it's so much more desirable for them to up-sell me  a renters policy.  Once I let them know that I knew they were trying to sell me something that wouldn't cover anything I wanted they said that they could only sell me the Inland Marine policy in conjunction with another policy.

So I went back to my broker- armed with all this knowledge I had just gained through all these calls & asked for the Inland Marine policy.  I told her what I wanted & what I knew that it should cover.  I am happy to say that ALL my gear is insured for $5000 (through Travelers Ins & double what it would cost me to replace it all) & it will only cost me $83/yr.  Granted Kim was able to pick up her $6500 policy for $65/yr- but I have heard that NV has some of the highest insurance rates in the nation. So I am considering myself lucky.  The best part is that it covers EVERYTHING.  When I say everything- I mean drops, kids breaking something, falling in the pool, clumsiness, if it gets wet on an amusement park ride- WHATEVER.  No deductible!!  The only exclusion is wear & tear, war, insect, vermin & nuclear. The nuclear could be a minor issue living where I do- or if it goes through the screening at the airport & it damages something that way- those things would not be covered. Other than that- I'm feeling very calm knowing that I have a little protection against things that could devastate me when it comes to my gear.

Look in to it!!!  It offers great peace of mind!


Pin It

Thursday, August 16, 2012

Shooting Sharp - Tips to Get Tack Sharp Shots

Today I thought I'd share some simple tips for getting sharp focus. In photography circles there is always a lot of buzz about getting tack sharp images. As a newbie, I was sometimes mystified by how the images I saw online were so crisp and sharp and mine were, well, not. I was awed by those shiny portrait eyes that seemed to pop off my screen. After much reading, googling and practicing, I uncovered some of the secrets of the pros. So, here are a few tips I've learned for getting sharp focus.

1. Use a tripod
Okay, I'll admit that I often skip this one. I'm too lazy to take it out and set it up most of the time. I'm also usually chasing my kids around and tripods are not exactly made for that task. But, if you are shooting a macro shot, landscape or posed portrait it will be a tremendous help! Any little bit of camera shake will effect your focus. Just do it!

2. Use a remote or wireless trigger
These devices remove all chances of shake as you don´t have to touch the camera. You can most likely find a remote compatible with your camera for under $20. I got one on amazon for about 10 bucks. Or, you can use the self timer. This is also a great way to get in some of those photos yourself. You don't want to be the family member missing from every photo in your archives!

3. Check  your shutter speed
Always make sure that your shutter speed is set higher than the focal length of your lens. For example, if you shoot with a 50 mm lens, set your shutter speed at least 1/60 or above. If you shoot with 85 mm lens, set your shutter speed at 1/100 or above, etc. And if you are skipping tip #1 and hand holding your camera, anything below 1/80 will be tough to keep steady.  If you are taking photos of kids, you'll need a faster speed to avoid motion blur. I always try to stay above 1/125 for squirmy subjects. Actually, since I'm lazy about using a tripod, I try to stay above 1/125 most of the time, which brings me to #4.

4. Up that ISO if you need to! 
It is more difficult to achieve tack sharp focus in a low light situation. If you don't have much light to work with, don't be afraid to increase your ISO. Most cameras these days handle higher ISO's pretty well. Get to know what yours can handle with practice. And remember that a properly exposed image will have less noise, even at a higher ISO, than one that has been underexposed and lightened up in post processing.

5. Shoot with a prime 
Prime lenses are known to be faster and sharper. They are generally more pricey but worth every penny in my opinion. The nifty fifty, 50 mm 1.8 is an inexpensive choice that offers speed and sharpness. The 50 1.4 is a little more expensive, but one of my favorite and most used lenses. It's sharp, fast, small, and delivers dreamy bokeh.

6. Check your F-stop
If you increase the number of your f-stop, more things will be in focus as you'll have more depth of field to work with. Shooting wide open not only eaves little room for error, but most lenses aren't as sharp at their widest apertures. If you want super sharp images you are probably better off to stop down a bit to a smaller aperture.

7. Toggle your focus point
Most DSLR cameras have a button to tell the camera how and where to focus. Check your camera's manual if you don't know how to do this. For portraits it is best to focus on the subject closest eye (or between the eyes if they are straight on) for close ups, and on the face for full body shots. If you are shooting a group, choose a subject in the middle of the group (check that your aperture is wide enough to keep the whole group in focus too!).

8. Choose AI Servo or AF-C
Your camera has different settings for how it will focus. Read your manual to get a better understanding of how this works. They are called different things on Canons and Nikons but work pretty much the same way. Most DSLR's have three options here: one for a subject that won't move (single shot or single servo), one for a subject that might move (Al focus) and one for moving objects (Al servo or AF-Continuous).
Most photographers I know (especially those shooting children) choose Al servo or AF-C so that the camera will track focus when the shutter is pressed half way (or the AF-ON button pressed) even if your subject moves

9. Try back button focusing. Most DSLR's have an option for separating your focus from your shutter release. You can designate a button on the back of your camera to control focus, usually the AF-On button. When you press this button it locks focus and then you press your shutter button when you are ready to record the image. It takes a little getting used to, but many photographer's swear by it for sharp images. My advice is to check your manual (or google "how to back button focus" for your camera model) to set it up. Then give it a try for a couple of weeks to see if it's for you. 

10. Sharpen...a little After following all of the above tips, you can sharpen in post processing, but easy does it! I like my images (especially portraits) to be pretty natural so I try to avoid over-processing them. But I do sometimes add a little sharpening to the eyes in Lightroom or Photoshop to help them pop. Keep in mind, if your focus is off when you click the shutter, then extra sharpening in post-processing won't fix the image. There are about a bazillion actions out there to add selective sharpening to eyes, brighten irises, and make those catchlights sparkly. But beware of creepy overdone eyes! Too much is definitely a bad thing. 


Remember to keep these tips in mind as you shoot, and you'll be on your way to some snazzy sharp images in no time!


Photobucket

Friday, August 10, 2012

how to edit bathtub pictures in Lightroom

How many of us love to take photos of our kids in the bathtub only to have them come out looking yellow and nasty and depressing? I know it's not just me. Most of the time the problem is that your white balance is off (unless you have a ton of amazing natural light in your bathroom, which, well, I'm not so lucky). Fortunately it is a super easy fix in post processing!


The white balance tool is super easy to use. See that little eyedropper thingie? Click on it. Next, click on something in your photo that is supposed to be white, black, or grey. (I clicked on a part of the bathtub). And voila! Like magic your photo isn't yellowish anymore!

See? Before:


And after! Ta-da!


And since I'm showing you one of my favorite Lightroom tools I thought I might as well show you my other favorite tool...the straighten tool. Seriously. I love it. To use it you just click on the little level icon and then you click along a line in your photo that you want to be either horizontal or vertical. In this photo I "drew" along the edge of the bathtub. Lightroom will then "straighten" your photo and put the crop box around it (because when you straighten you end up losing a part of the edge of your photo), so you can then drag the corners of the crop box to make it smaller (like I did here) and then when you like what you see just hit enter to accept your straighten and crop! This is my favorite tool because I actually think it is really fun to do. I am a total nerd, I know.


PS I have a fabulous giveaway for a sweet camera bag going on over at AND THEN, SHE SNAPPED this week. Make sure you enter!

Wednesday, August 8, 2012

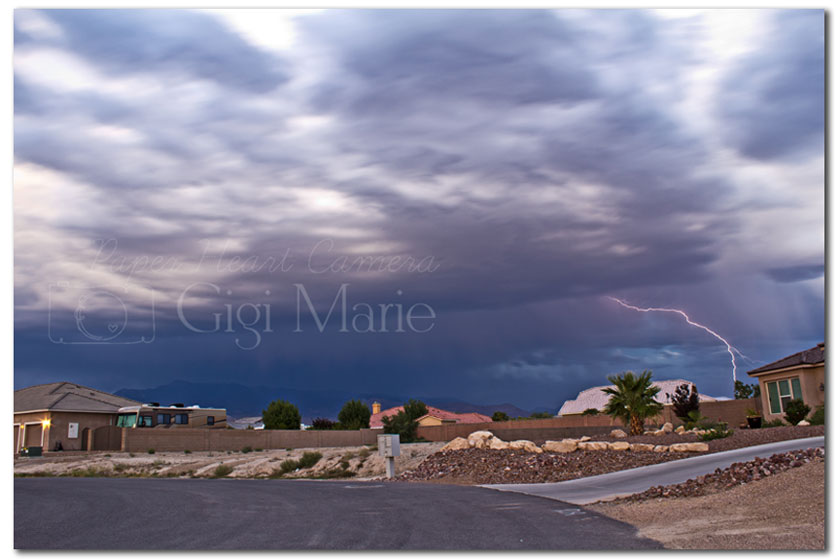
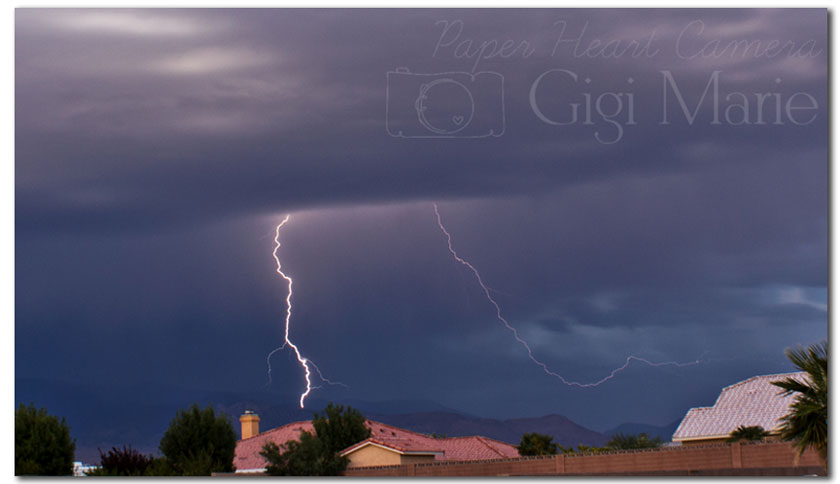
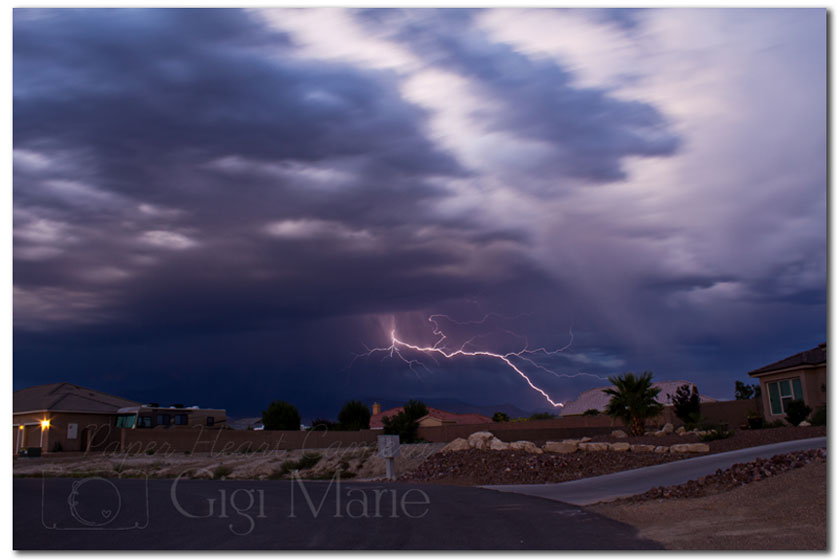
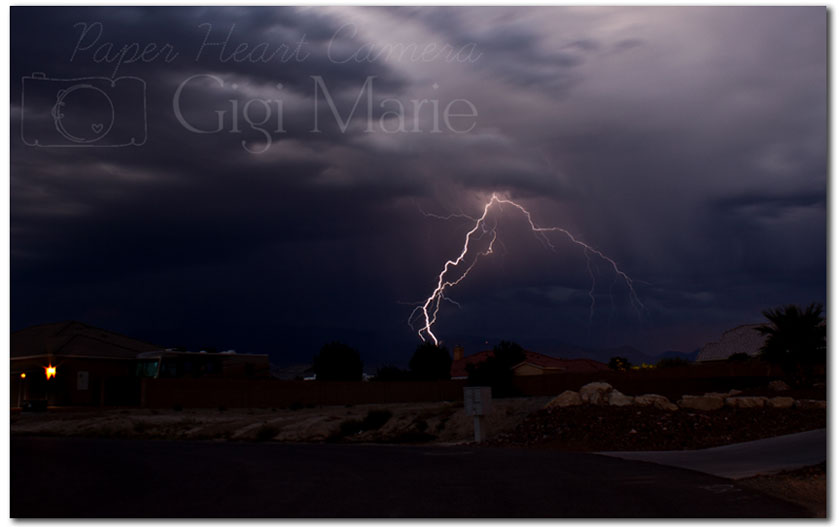
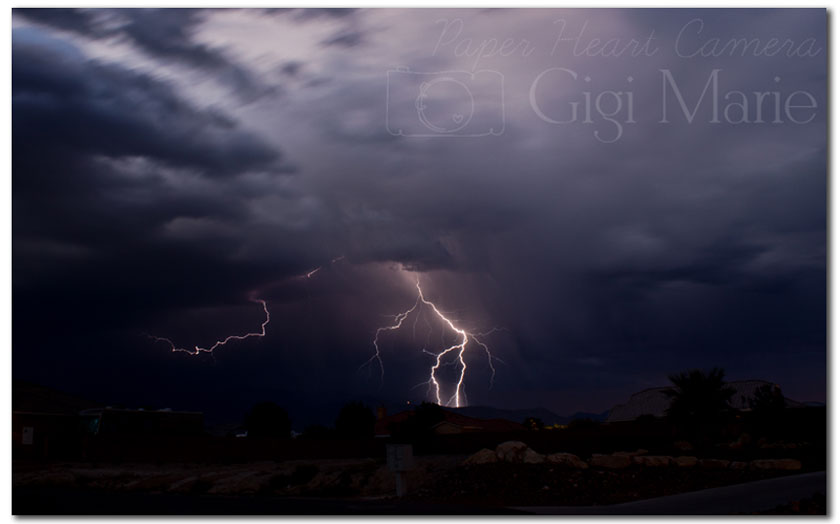
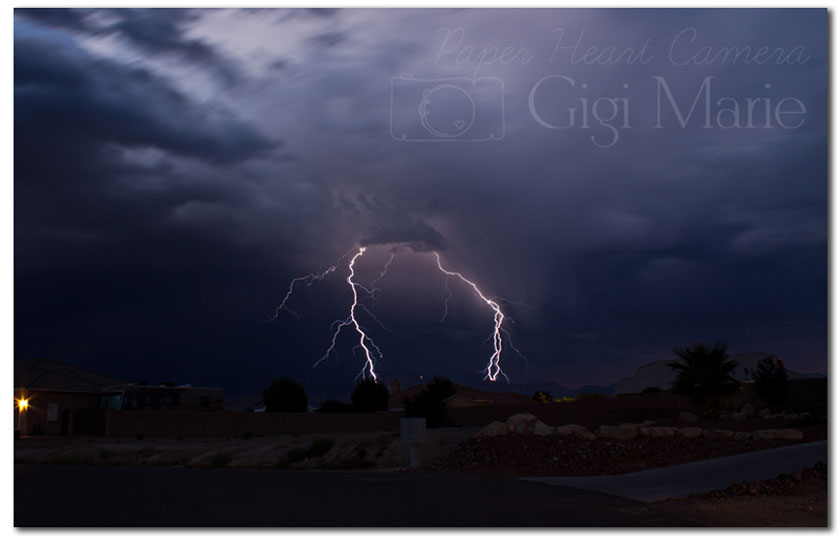
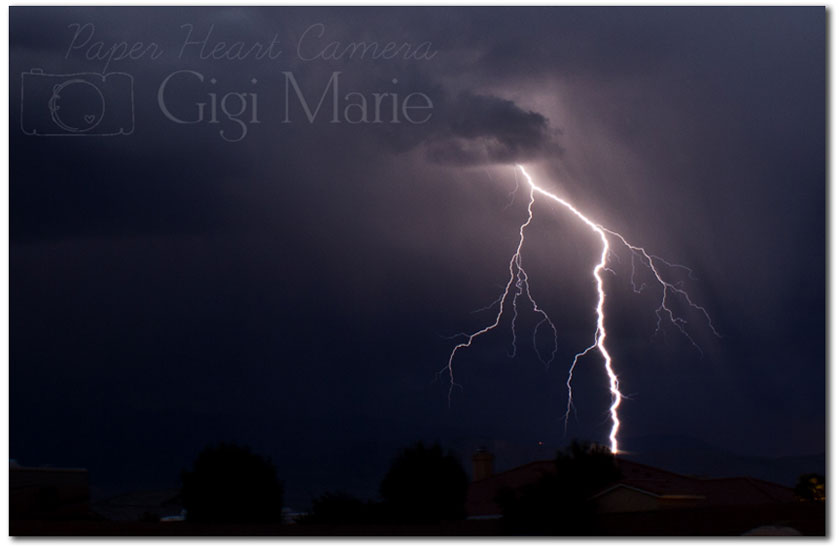
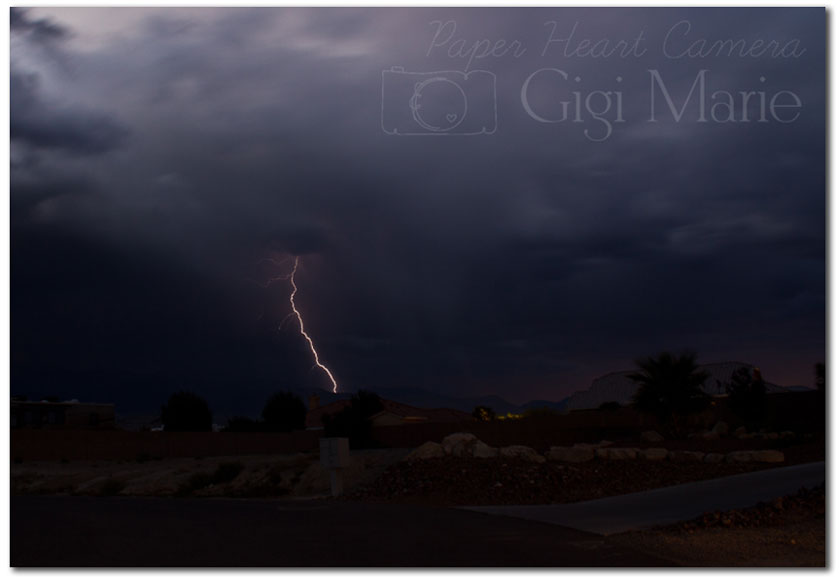
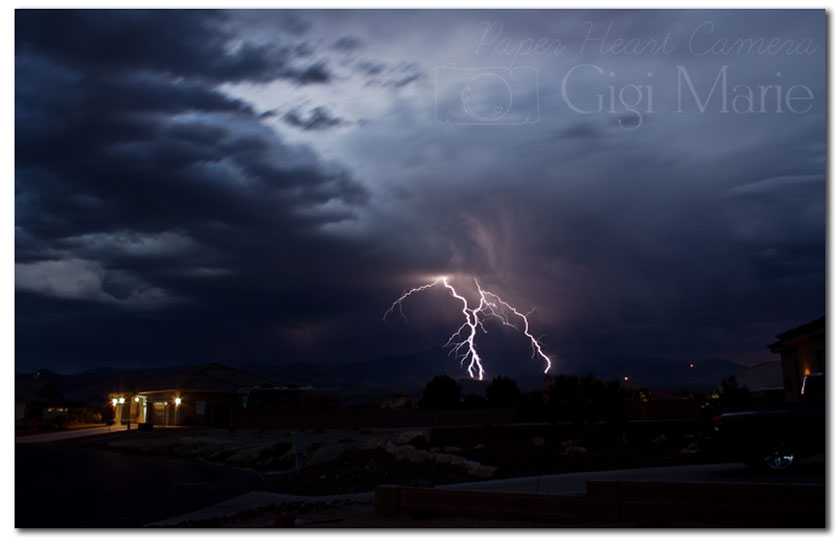
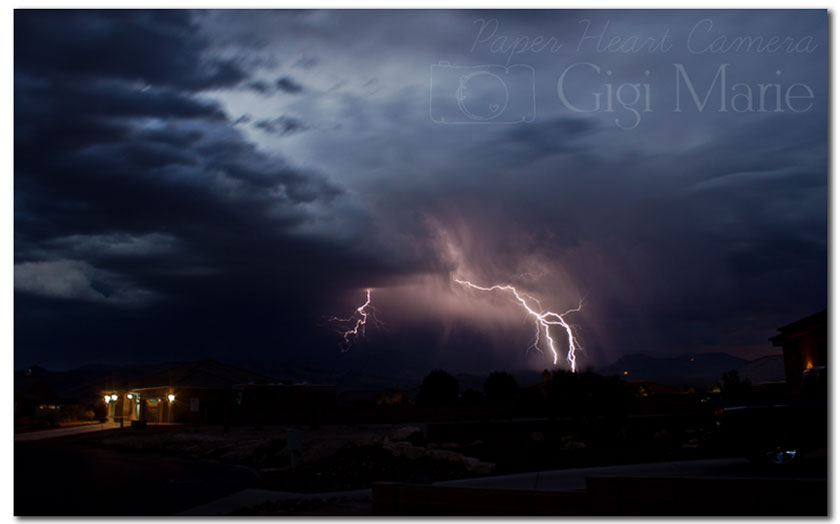
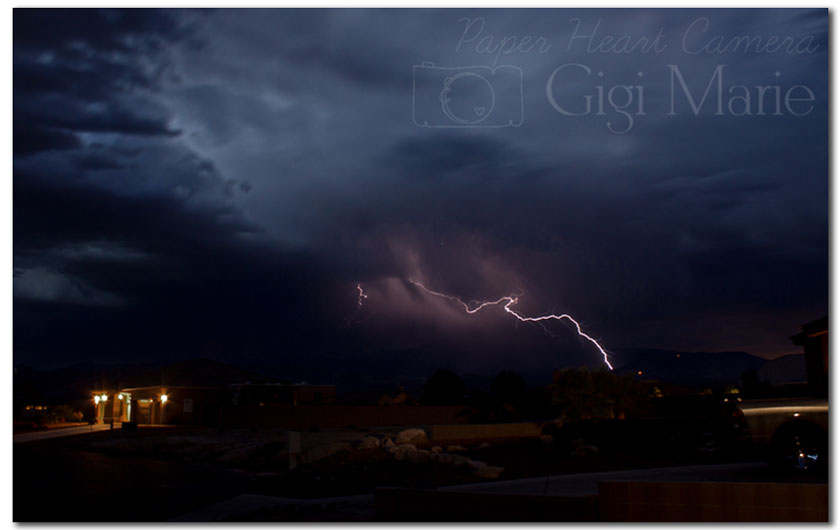
10 Tips for Capturing Lightning

I have long been in awe of images of lightning.  It's such a raw & powerful thing & since it happens so quickly, it can be difficult to capture.  But I think this is why I was so drawn to learning how to capture it. There are some tips from Peter West Carey over on Digital Photography School found HERE that you might find useful.  Some, like the ISO suggestions, I actually disagree with- which leads me to the fact that each photographer does it a bit differently for the situation & their own personal taste.  There are numerous ways, many of which I have either not learned yet or have been unsuccessful at for now- but I am going to share with you the things I do to increase my chances for success.  


1. Start with the sky relatively dark.  I have tried as early as 6-7 p.m. & this still wasn't quite dark enough since the summer nights start so late.  You are going to have your shutter open for a long time- so obviously if it's too light out you will capture nothing but white. I am sure there are ways to capture during the day- I have not looked in to it yet & so I have no solid info on just how to do that. It's on my bucket list for sure. 


2. Use a tripod set in an area with a sturdy surface preferably with some cover in case you start to get rain.  The last thing you want is to have to abort your time capturing because you are getting wet.  


3. Use a wide angle lens.  For these I used my kit lens (18-55mm) because it is the widest one I have.  Because it doesn't have too much range in it's focal length, it's still pretty sharp. You never know where the strikes will hit. I can't tell you how many times I saw one come down & it was just outside my frame.  I was bummed.  


4. I also like to find a wide open spot.  I know that most places are not so open as we are here in the desert- so finding a wide open view that also has cover can be hard. But sometimes capturing what the lightning looks like through trees & having that view of the "whole scene" can really make the shots something special. 


5. I like to set my ISO low so I have a nice sharp image- usually either 100 or 200. 


6. I set my aperture to f/7 or so to make sure I am able to capture everything I see in focus.  I have made the mistake of having it too open & ended up with the foreground in focus & the actual lightning was out of focus.  So this is something I really feel is imperative.


7. Shutter- set to 30 seconds.  For these images I was just pressing the button every 30 seconds- I have just recently started using my remote to set it to bulb & leave it open longer.  That is your choice & depends on the frequency of the bolts.  All of the shots in this post are from the same evening.  The storm was very active & so I was capturing at least one bolt with every 30 seconds the shutter was open. That totally helped & it went on for hours.  So if you are like me & you think you might miss something spectacular if you go inside- have a battery backup charged & ready to go.  I sat outside for 4+ hours with this storm, leaving my shutter open every 30 seconds for the entire time.  I pulled up a stool & just enjoyed the show. 


8. Because of the low light- you are going to want to focus manually.  This can be a pain- but I usually find something to get my focus on in the foreground & do a few test shots.  Then I zoom in to my maximum I can on my screen to make sure everything is crisp before spending all the time capturing for hours only to find out they are all out of focus & should go in the trash.  Once you get that focus- don't move unless you have to. Otherwise you have to start all over with getting your focus & then you might miss something awesome.


9. Be patient.  I can't stress this enough because while I had many captures in this particular storm- they don't all come with multiple bolts within a 30 second period of time.  There is a suggestion in the link I mentioned above that you can layer your images in processing if you like to get the desired effect you might be after.  I have not tried this.  I like to leave my images as true to what it really looked like, so I don't enhance them in that way. Which leads me to my next point...


10. Don't over process.  All of these images I opened in ACR & adjusted the clarity & sometimes the temperature if needed.  Sometimes the lights from houses can come out very orange or yellow when the shutter is open that long- I feel it detracts from the real excitement of what I was out there to capture- so I always try to tone those house lights down.  Other than that- I sharpen & that is it.  Sometimes I will crop in as you have seen in some of these- but for the most part I really like to have the foreground showing to give scale to the storm over the neighborhood.  That is my personal taste though. 


Have a great time 

Gigi Marie the Chic Homeschool Mama  www.chichomeschoolmama.com

Pin It

Monday, July 23, 2012

7 steps to take amazing instagram photos plus 10 must have photo apps.

Hey Guys! This is Audrey from The Daily Wyatt and I admit I use my iPhone as my main camera more then I use my dslr camera. The main reason is because its small enough to stick in my pocket, always available plus I am an instagram-oholic. Arent you?

So today I thought I would share my tips and tricks on how to get amazing photos from your iPhone. I hope you use them to your advantage.

raindrops - Copyfourhtofjuly4 - Copyfireworks - Copybannaflowers4 - Copybannaflowers2 - Copybannaflowers - Copy

1. Never use the instagram camera. I notice that when I have used the instagram camera the quality is well, crap, grainy. plus you cant take multiple shots. So your stuck with that imagine until you load it to instagram.
2. Hold your phone like you would hold your camera. With two hands. The more steady you hold it the better the image will be.

flowers1zion24 - Copyanamericanflag - Copywatering6treestomp3citycreek3

3. Find the perfect light. Its just the same as when taking photos with your dslr. you look for that perfect light. do the same thing with your iPhone. The better the light, the better the picture. (you could use a tripod even.)
4. DONT ZOOM. ever. You will lose heaps of quality and your photo will be extremely pixelated and grainy even if its just a tiny bit zoomed. If you want a close up picture go closer to the object. period.

citycreek2citycreek1citycreekwyattandkipperkipper2blanket8

5. Clean the lens often. (duh)
6. Look for different perspectives. I know when I shoot with my dslr camera I take the time to find a different way to look at what I am shooting. I do the same with my iPhone. shoot from below, from up high, from a different side. Shoot multiple times to get the photo that looks the best to you. (you can always delete and start over.)
7. Use other photography apps to process your imagine.

wyattinglasses2wyattinglasseswyattinglasses1callie3blanket2moviedate

The main apps I use to process my iPhone photos are:
  • Snapseed: Worth every penny. You can adjust everything! I mean EVERYTHING
  • Vscocam: This is my all time favorite filter app. Comes with 10 different filters that you then can adjust to your liking. Love this app! Love it!
  • ShakeitPhoto: This is my go to quick edit. It acts just like a polaroid and 9 out of ten times you use it the photo comes out looking great with not a lot of work.
  • PS express: I use it only to reduce noise. That's it.
  • Lenslight: When I want to add extra light to my photo to give it more of a dramatic feel I use this app.

watermelon11goodnightdreamtogether2paintedus11bryceapril18

  • Crossprocess: Its the same concept of shake it photo but gives it a more dramatic look.
  • Picfx: Its an all in one place for filters, textures light and so much more.
  • Pictueshow: I haven't use this one in a long time but I do love the frames and textures it has.
  • easyTITLER: The best app to add words to your photos. Gives you a ton of fronts and options to adjust the opacity of them.
  • Squaready: The perfect app to use when you don't want to crop you photo into a square to add it to instagram.

zion6watermelonrainyday1treeadventure1rainyday2

I hope this inspires you to take more amazing photos with your camera phone.

  • Do you have a favorite camera phone photo? Share them on our Facebook page here 
  • Is there other editing apps you think we should try? Let us know in the comments. 
  • Android users what apps do you use?
  • Follow us on instagram @thedailywyatt@satakieli, @sarahmhalstead, @alitajewel ‎@summercrosbie @desirae_ra @stephaniesclark  @andthenshesnapped @melissabrich leave your handler in the comments and we will check out your feeds too!
Thanks guys for taking the time to read this post have a good Monday and I will see you again next time!


Audrey from The Daily Wyatt