Showing posts with label tutorials. Show all posts

Wednesday, September 19, 2012

Adding Texture to Your Photos

Adding textures to your photos is a fun way to either spruce up or add drama and character to your already amazing photos. You can make them into works of art and it's really quite simple to do! 
 Photobucket I use photoshop to edit my photos, so once I am done with my edit I then add my texture. Kim Klassen is an amazing place to get textures. And MCP Actions has a free add texture action on her blog page. It makes it easy and simple!
 Photobucket Once you've added the texture of your liking, I like to mess around with the layer option, i.e. multiply or soft light and opacity.
Photobucket And there you go, a vintage look to a fun picture! Super easy!
Photobucket When you add texture to photos with faces and people, I like to use a soft brush or eraser to erase some of the texture off the subject. That way it your subject stands out and doesn't have any weird lines or colors on them.
 Photobucket Photobucket And sometimes, just keeping it simple makes all the difference. You don't always have to make it dramatic to give it the right look.

Have any texture tips? Please share them!! :)

Photobucket

Wednesday, August 22, 2012

A Clean Edit {PicMonkey Tutorial}


I know there are many many people using PicMonkey these days for editing photos, especially bloggers. So, I thought I'd give a little tutorial on how to do just a basic "clean" edit using this FREE online photo editor. There are a lot of features that may eventually be features that you have to register and pay for, but much of what I'm going to use are basic and will hopefully always be free.


  1. Open your photo for editing. 
  2. I initially resized my photo because I shoot in RAW and the file is HUGE! So you can do this by just going to Resize at the bottom of the left hand column and typing about 3200px for the long side of the photo. This will allow you to safely print up to an 8x10. 
  3. I start with correcting my White Balance (sometimes I crop first, but didn't for this photo).  Choose Colors > Neutral Picker> take the eye dropper and click on a neutral/white area in your photo. You may have to do this a couple of times to get the right balance. Then you can warm it up if you feel like it needs it but sliding the Saturation bar to the right. Click Apply (this will be for every part of the edit, so I will not actually say that for each step). If at some point you've applied an edit and decide you want to go back there is an undo button just above your photo as you can see in the screen shot below.


4. Once I have my colors corrected, I begin correcting the skin (if needed). Choose the Lipstick to reveal the Touch up tools. You are going to want to be VERY careful here as it can get out of hand fast! (especially if you are editing yourself) ;) You don't want it to look too fake or "touched up". What I wanted to accomplish here is to remove unwanted blemishes or shadows causing an unnatural appearance. 

5. Skin Correction: 
  • Airbrush tool set to natural, adjust brush size, and fade to between 70 and 90 percent. Brush cheeks, under eyes, and other areas of bare skin if needed. You can always fade it more after, but if you need two different settings you'll have to "apply" then start again. 
  • Choose the Blush Boost tool. I used this here only because after getting rid of the shadow made her look a little washed out and it was a very overcast, dreary evening. I brushed a very light peach/pink onto her cheeks and faded to my liking. 

7. Teeth Whitening: I use this tool for well teeth whitening, but in this case I used it for eye whitening. In many photos you will find that an overcast or shadow may cause the whites of the eyes to look a little grey or blue. I am not a big fan of PicMonkey's Eye Brightening tool. So, I use a combo of teeth whitening and Dodge in the Effects section. Zoom in and brush the whites of the eyes desaturating the tint.  

8. Effects: For a clean edit, we won't use any of the real effects that are offered here, but the Advanced editing tools found at the bottom of that section. 

  • First, I chose Dodge. Her eyes, especially the irises, are pretty dark so we want to lighten them up a little. I set it to mid tones and just began to brush. I had to redo this several times to get a look that I liked. Remember natural is best for  a clean edit (you can add effect later). 
  • Next, I chose Burn and made my brush pretty small. I went over the outline of her face, hair, and dress around the neck. This I used it on her lashes and lips to add a little depth.
9. Crop, Resize for Blog, Watermark using the "P", Save!


That's it! I hope this was helpful. Please let me know if you use it. You can find how I used PicMonkey to do a Black and White conversion here. You can find my model here. And you can find me here, here, and here.

XO
Stephanie Clark
Behind the Camera and Dreaming

Friday, August 10, 2012

how to edit bathtub pictures in Lightroom

How many of us love to take photos of our kids in the bathtub only to have them come out looking yellow and nasty and depressing? I know it's not just me. Most of the time the problem is that your white balance is off (unless you have a ton of amazing natural light in your bathroom, which, well, I'm not so lucky). Fortunately it is a super easy fix in post processing!


The white balance tool is super easy to use. See that little eyedropper thingie? Click on it. Next, click on something in your photo that is supposed to be white, black, or grey. (I clicked on a part of the bathtub). And voila! Like magic your photo isn't yellowish anymore!

See? Before:


And after! Ta-da!


And since I'm showing you one of my favorite Lightroom tools I thought I might as well show you my other favorite tool...the straighten tool. Seriously. I love it. To use it you just click on the little level icon and then you click along a line in your photo that you want to be either horizontal or vertical. In this photo I "drew" along the edge of the bathtub. Lightroom will then "straighten" your photo and put the crop box around it (because when you straighten you end up losing a part of the edge of your photo), so you can then drag the corners of the crop box to make it smaller (like I did here) and then when you like what you see just hit enter to accept your straighten and crop! This is my favorite tool because I actually think it is really fun to do. I am a total nerd, I know.


PS I have a fabulous giveaway for a sweet camera bag going on over at AND THEN, SHE SNAPPED this week. Make sure you enter!

Wednesday, August 8, 2012

10 Tips for Capturing Lightning

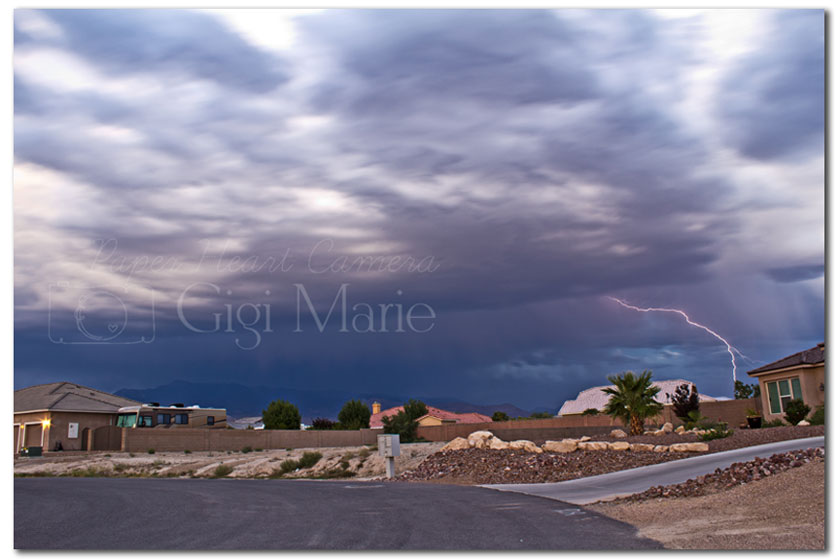
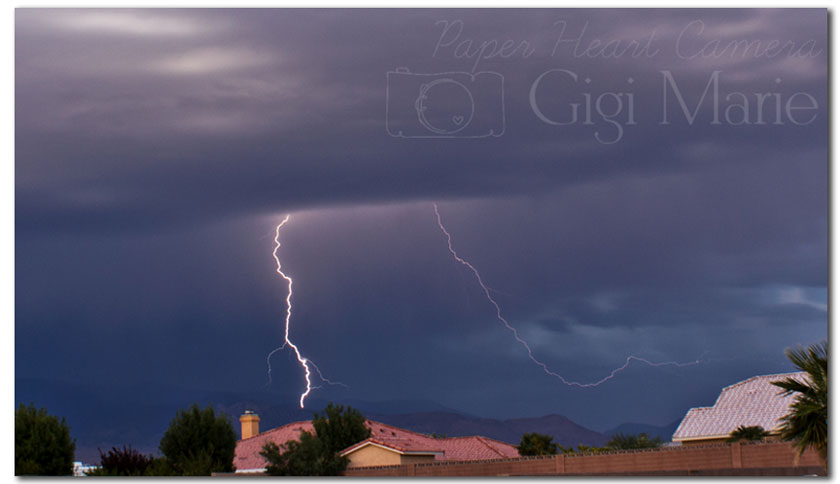
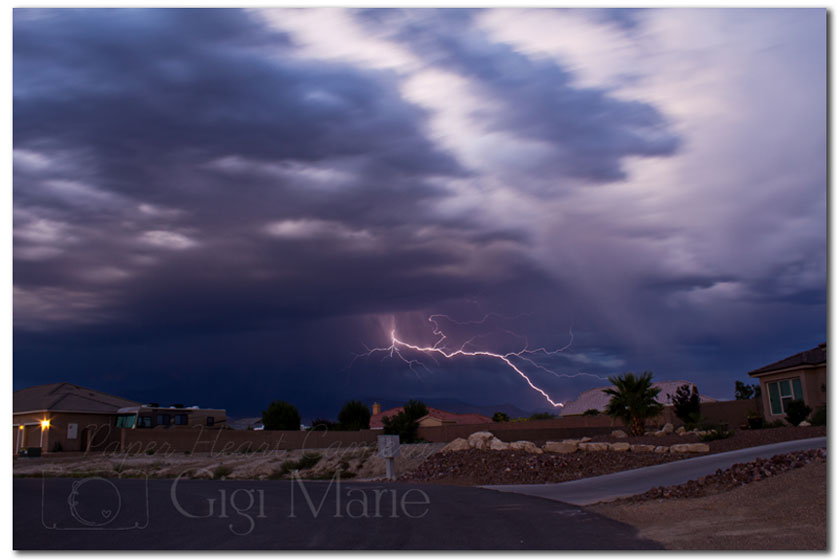
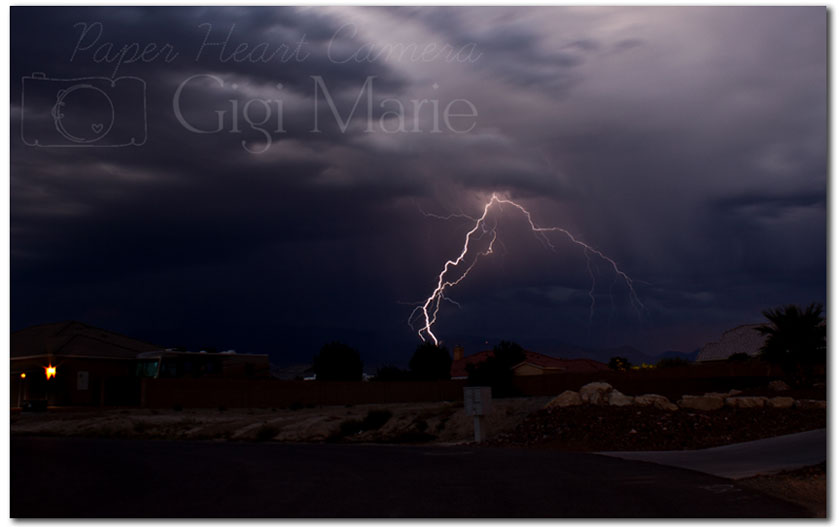
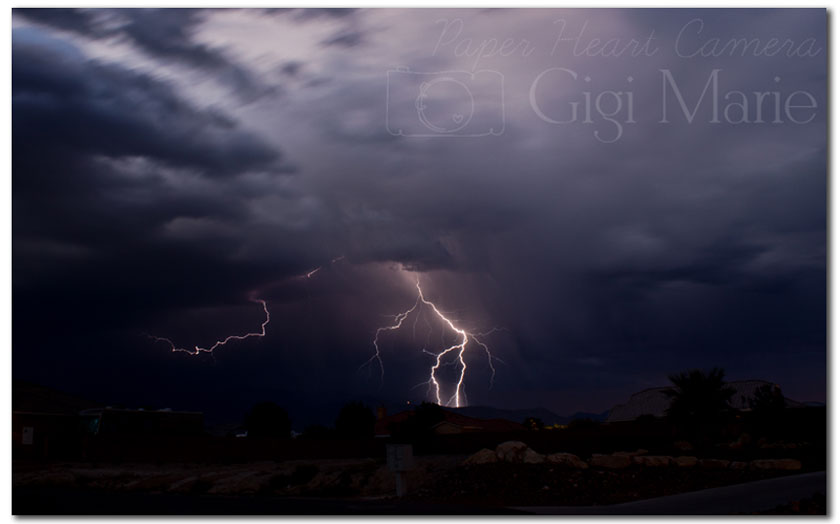
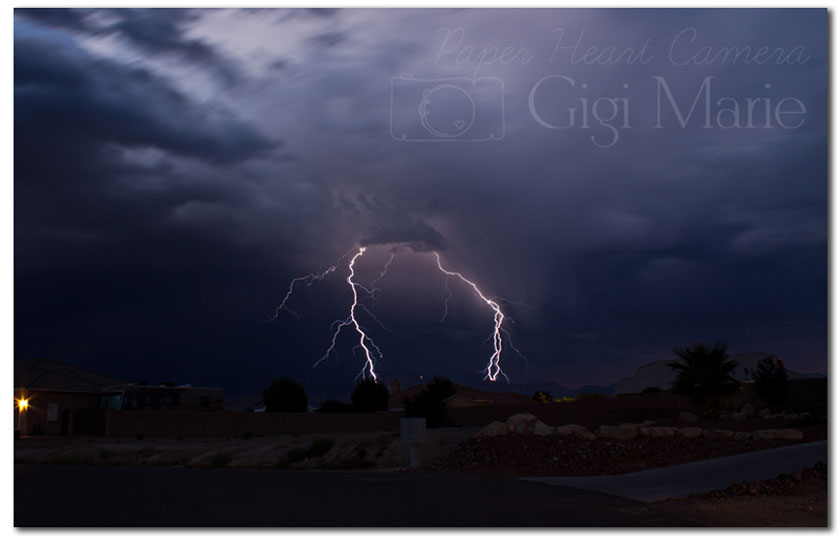
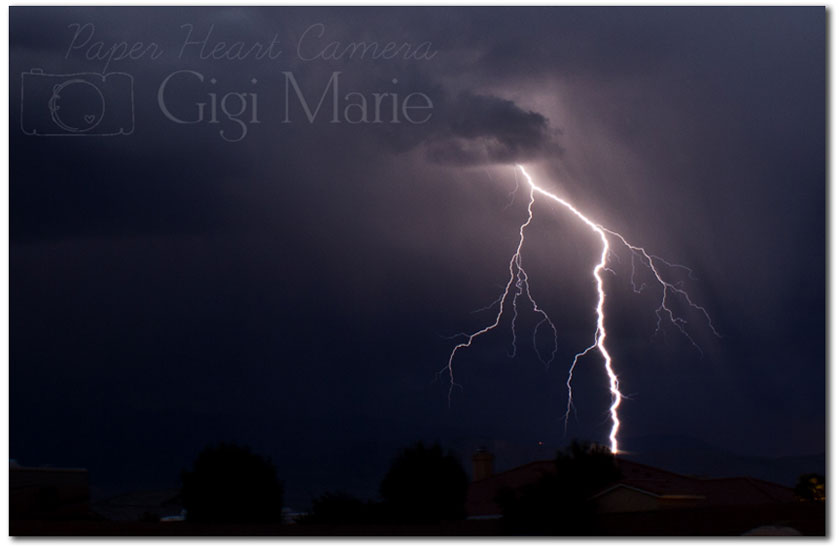
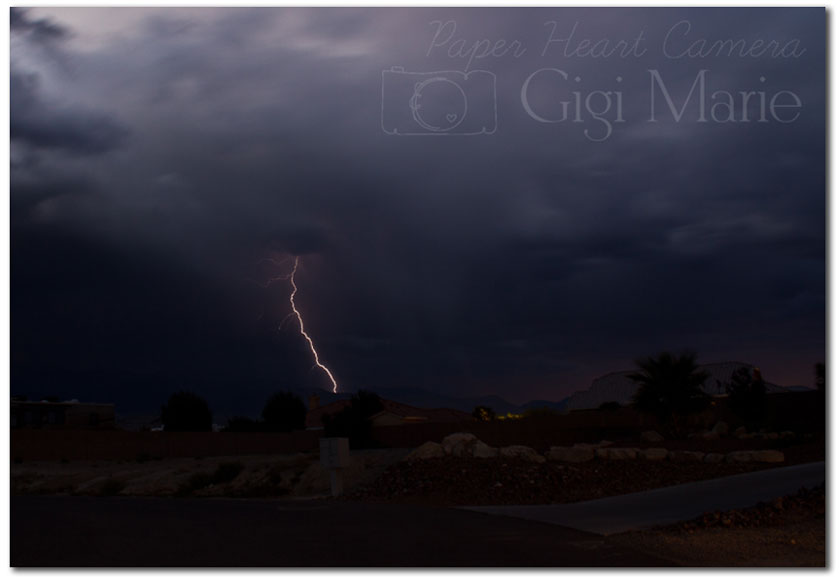
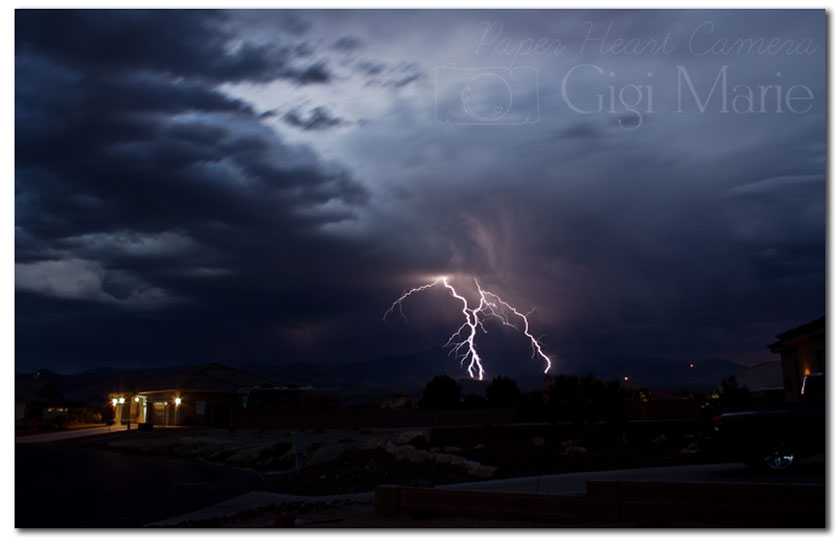
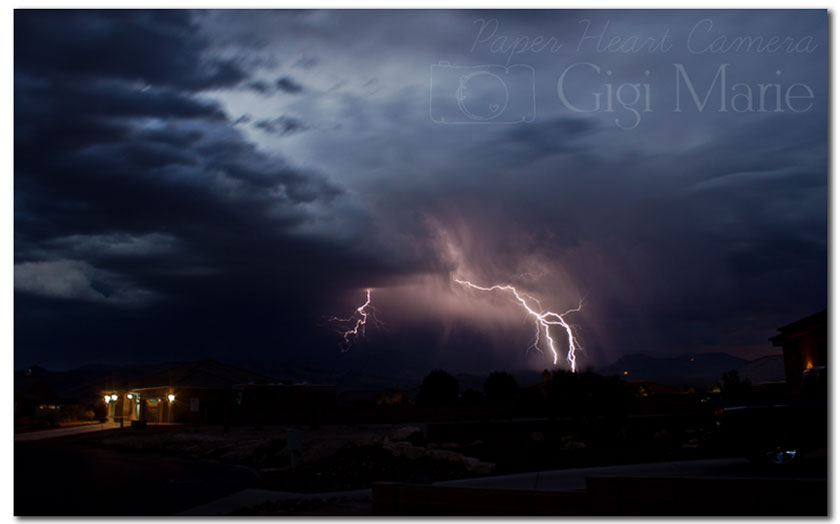
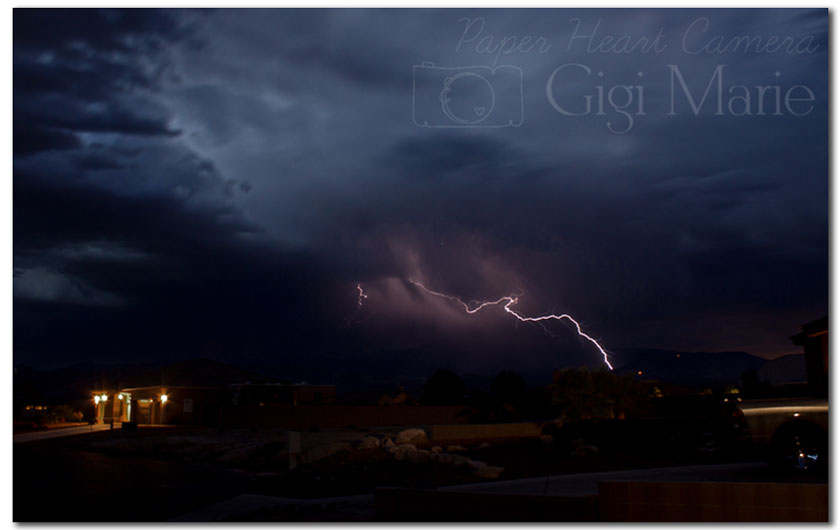
I have long been in awe of images of lightning.  It's such a raw & powerful thing & since it happens so quickly, it can be difficult to capture.  But I think this is why I was so drawn to learning how to capture it. There are some tips from Peter West Carey over on Digital Photography School found HERE that you might find useful.  Some, like the ISO suggestions, I actually disagree with- which leads me to the fact that each photographer does it a bit differently for the situation & their own personal taste.  There are numerous ways, many of which I have either not learned yet or have been unsuccessful at for now- but I am going to share with you the things I do to increase my chances for success.  


1. Start with the sky relatively dark.  I have tried as early as 6-7 p.m. & this still wasn't quite dark enough since the summer nights start so late.  You are going to have your shutter open for a long time- so obviously if it's too light out you will capture nothing but white. I am sure there are ways to capture during the day- I have not looked in to it yet & so I have no solid info on just how to do that. It's on my bucket list for sure. 


2. Use a tripod set in an area with a sturdy surface preferably with some cover in case you start to get rain.  The last thing you want is to have to abort your time capturing because you are getting wet.  


3. Use a wide angle lens.  For these I used my kit lens (18-55mm) because it is the widest one I have.  Because it doesn't have too much range in it's focal length, it's still pretty sharp. You never know where the strikes will hit. I can't tell you how many times I saw one come down & it was just outside my frame.  I was bummed.  


4. I also like to find a wide open spot.  I know that most places are not so open as we are here in the desert- so finding a wide open view that also has cover can be hard. But sometimes capturing what the lightning looks like through trees & having that view of the "whole scene" can really make the shots something special. 


5. I like to set my ISO low so I have a nice sharp image- usually either 100 or 200. 


6. I set my aperture to f/7 or so to make sure I am able to capture everything I see in focus.  I have made the mistake of having it too open & ended up with the foreground in focus & the actual lightning was out of focus.  So this is something I really feel is imperative.


7. Shutter- set to 30 seconds.  For these images I was just pressing the button every 30 seconds- I have just recently started using my remote to set it to bulb & leave it open longer.  That is your choice & depends on the frequency of the bolts.  All of the shots in this post are from the same evening.  The storm was very active & so I was capturing at least one bolt with every 30 seconds the shutter was open. That totally helped & it went on for hours.  So if you are like me & you think you might miss something spectacular if you go inside- have a battery backup charged & ready to go.  I sat outside for 4+ hours with this storm, leaving my shutter open every 30 seconds for the entire time.  I pulled up a stool & just enjoyed the show. 


8. Because of the low light- you are going to want to focus manually.  This can be a pain- but I usually find something to get my focus on in the foreground & do a few test shots.  Then I zoom in to my maximum I can on my screen to make sure everything is crisp before spending all the time capturing for hours only to find out they are all out of focus & should go in the trash.  Once you get that focus- don't move unless you have to. Otherwise you have to start all over with getting your focus & then you might miss something awesome.


9. Be patient.  I can't stress this enough because while I had many captures in this particular storm- they don't all come with multiple bolts within a 30 second period of time.  There is a suggestion in the link I mentioned above that you can layer your images in processing if you like to get the desired effect you might be after.  I have not tried this.  I like to leave my images as true to what it really looked like, so I don't enhance them in that way. Which leads me to my next point...


10. Don't over process.  All of these images I opened in ACR & adjusted the clarity & sometimes the temperature if needed.  Sometimes the lights from houses can come out very orange or yellow when the shutter is open that long- I feel it detracts from the real excitement of what I was out there to capture- so I always try to tone those house lights down.  Other than that- I sharpen & that is it.  Sometimes I will crop in as you have seen in some of these- but for the most part I really like to have the foreground showing to give scale to the storm over the neighborhood.  That is my personal taste though. 


Have a great time 

Gigi Marie the Chic Homeschool Mama  www.chichomeschoolmama.com

Pin It

Friday, August 3, 2012

Lifestyle Photography {Tips and Tactics}


Lifestyle photography is a term that gets thrown around a lot. There have been a lot of interpretations for the genre, so therefore it seems that there is an over abundant amount of photographers that claim their work as within the lifestyle realm. Which I think is fantastic. To me, lifestyle photography is similar to a photojournalism approach where the picture taker is trying to get the whole story with one shot in very realistic terms. In other words, keeping it very real. No poses. No fake smiles. And sometimes the subjects aren't even looking at the camera. Whoa-gasp! But it is all in fun and it should be effortless.


Lifestyle photography is a piece of art. It is a treasure for future generations as they get a glimpse of the real past. Many times it shows the real emotion behind a moment and it sets the scene for future realizations about family and friends. So today, if you haven't figured it out already, we're going to talk about lifestyle photography. I want to give you some tips so that you can go out and capture real moments. I promise you, it is fun, easy, and will forever touch a piece of your soul. Getting to know someone through the camera lens is a genuine privilege, but then being able to give away the art- a true treasure.


1. Focus on the Subject.

When you focus on the subject on hand first in a picture then all else will come naturally. Look for the best lighting possible, and observe the activities that are going on around you. If you are taking pictures of dancers what feature is moving the most? What small moments touch your heart? Do you sigh at hand holding or clapping? Do you linger over footsteps moving in soft carpeting? Focus on the concentration it takes to remember steps, or the lightheartedness of being completely free to dance any way the subject wants. Just focus on the subject and you'll be off to a good start.


2. Don't set up the shot.

I know. It goes against everything you have learned about taking pictures of other people, but lifestyle photography is all about capturing a moment in real time. Pictures that are posed are fantastic, but they don't belong in this realm of photography. Let things happen naturally and be there to make sure you get the best possible capture of emotion.


3. Remember the details.

Capturing the details is essential. Make sure to focus on the head that is turned away in hesitation because of fear. Or little fingers grasping something with excitement. Capture the round belly snuggled in pajamas or highlight the fullness of a toddlers cheeks, toes, or fingers. Details make the picture pop. And not every picture needs a smile.


4. Don't Tidy up the scene.

Document things as they are. The angry bird in the corner of the couch- leave it. The canister of playdoh left on the kitchen table half drying- don't even think of touching it. Simply take a picture of what you see. Get a sense of the whole picture without interfering. Also, a good rule of thumb is to back it up. Get the whole scene and don't always focus tight on the face or portrait.


5. Take your time.

It is hard to set up a time limit with lifestyle photography. You don't live with your client or subject, so to really get a sense of who they are you must take your time. And let your client know that this kind of photography can take a couple hours up to even an entire day. To keep lifestyle photography authentic you must let pictures unfurl as they may.


Lifestyle photography is all about them. It is all about the subject you are capturing and it has nothing to do with you. As a real moment professional or picture taker your job is to only observe and enjoy the real moments occurring in their hearts. For it is their story you are trying to capture. It is their cherished every day activities and it is their history, love, and family dynamic that they get to recognize through your art that is the real treasure. It makes lifestyle photography truly priceless.

...

Have fun capturing those real moments!
Alita- of Alita Jewel's Treasures