Photography is one of those things that continues to evolve week after week, month after month, and year after year. It seems that for a while, every where you look there are photographers trying to emulate and replicate images that the other has shot. One key element to remember, however, is that each photographer has their own sense of
style. Rebecca talked a bit about
Finding Your Style in her post on Wednesday and how just because you are visually drawn to something doesn't mean that you have to commit to it.
Once I mastered the act of using my camera in manual and taking advantage of how my camera worked, I knew that I needed to figure out what kind of images reflected who I was an artist, both behind the camera and behind the screen during post-processing.
I love light. I love the natural haziness and mystical awe created by beautiful sunlight.
Unfortunately, here in Alaska that gorgeous sunshine and golden hour of photographic bliss that many professional talk about is rare. And when it does occur, it's often late into the evening (think close to midnight during the summer) or in the wee hours of the morning (3:00 am photoshoot anyone?).
I spent hours looking through the image galleries of photographers like
April Neinhuis and
Jenny Cruger. They both created the type of image processing that I adored and hoped to recreate in my own way. After hours and hours of playing in Photoshop and browsing the
Clickin' Moms forum, I found a way to replicate that style that I loved.
Please keep in mind when doing any kind of post-processing that it's best to start out with a properly exposed image and a good clean edit. No amount of post-processing can save an image that hasn't been properly exposed.
I start out with my SOOC (
*straight out of camera) image:
I do my routine clean edit using a variety of self-made actions and workflow actions from
Florabella:
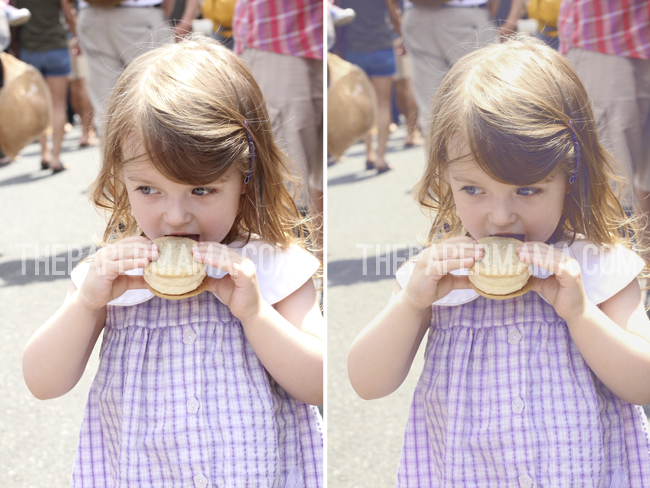
Notice that in my clean edit I slightly over-exposed the skin. That's because the matte effect I'm about to create is going to darken the highlights in the image and bring the skin tones back down to a more appropriate level.
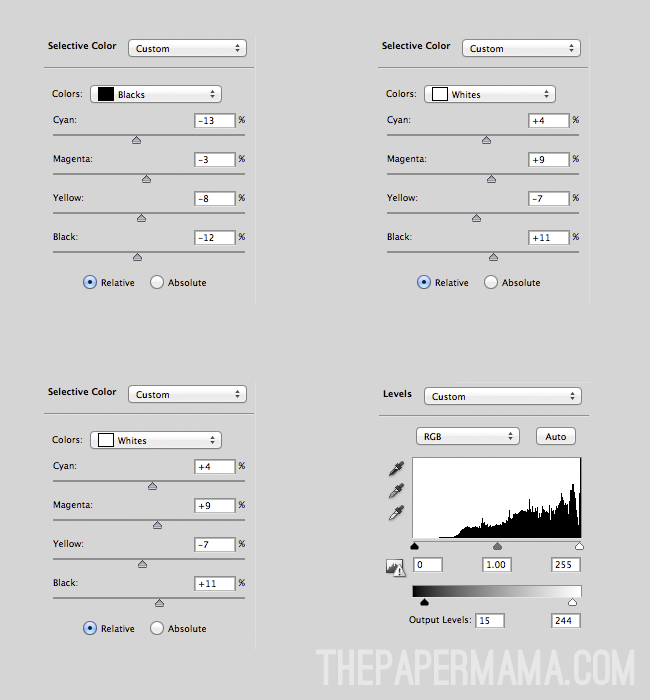
There are several ways to create the matte effect in Photoshop aside from using pre made or costly actions. The two methods I use involve the curves layer adjustment or the levels adjustment. Today I'm going to teach you how to create the matte effect using the levels tool in Photoshop.
When using the levels adjustment, we're going to adjust the output levels. As you can see in the example below, simply adjusting the output levels makes the image lose a bit of clarity and sharpness. It can also easily wash out color and contrast.
Simply drag the black arrow as pictured to the right to adjust the tone and contrast of your image. This will allow you to retain your matte and haze while still getting a good well contrasted image.
You want to make all of these adjustments gradually. Use several layers if necessary until you achieve the look that you want. I like for my images to remain full of contrast and color with a hint of haze and matte.
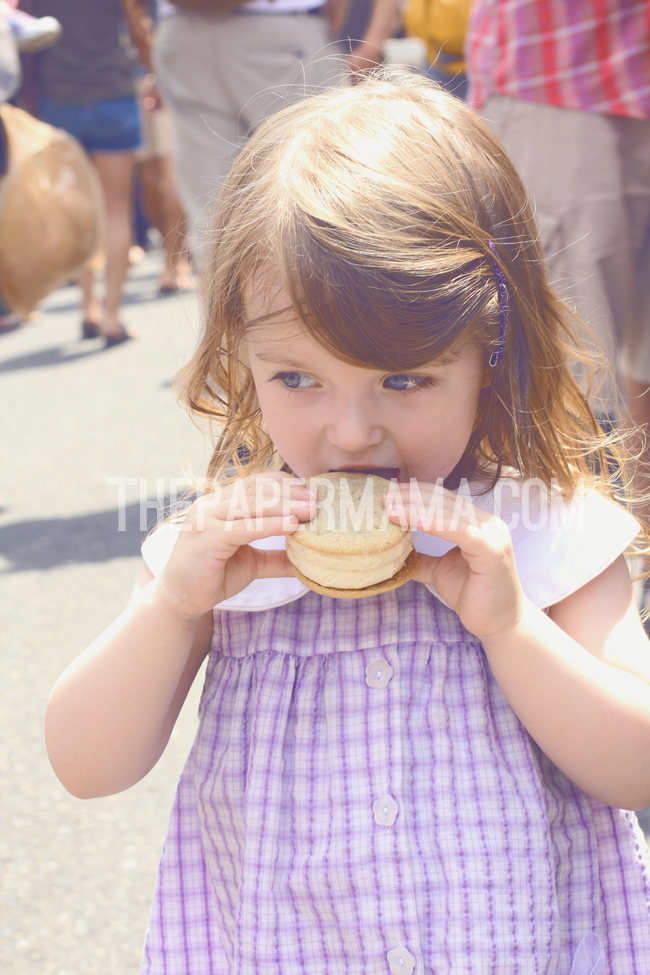
The clean edit compared to my final product:
Next time I'll share how to use the
curves layer to achieve a similar, but more dramatic effect.
Use this technique on your own photos? Feel free to share them on
my Facebook Page or on the
Paper Heart Camera Page!
 Written by Courtney Kirkland


