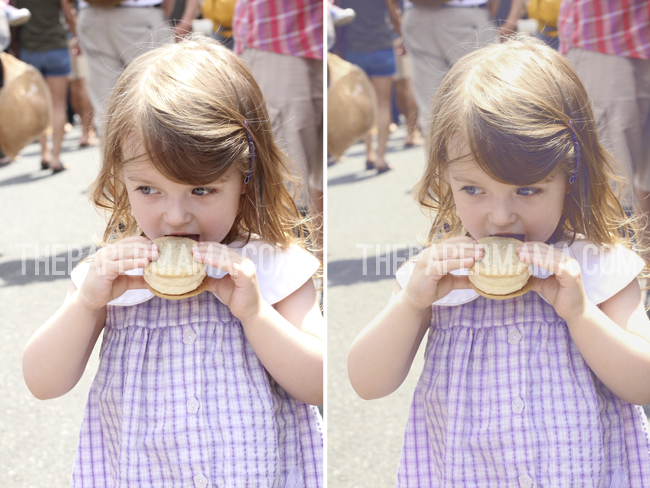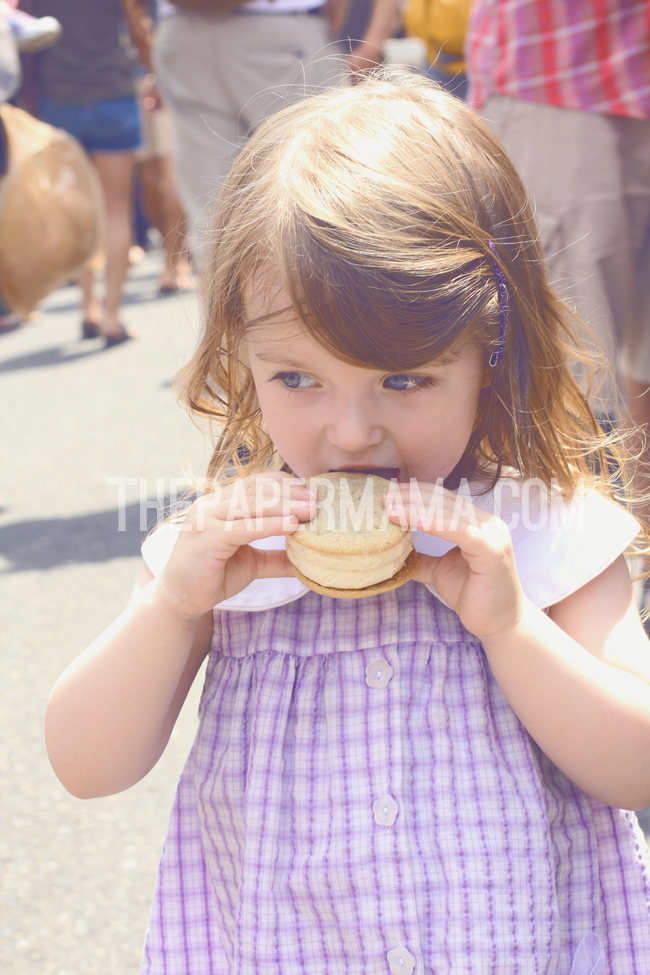
I'd like to share a quick way to add a vintage haze and color to your photo (without overdoing it). I do this to most of my photos. I've created a few different actions that I personally use over and over. This is the most simple way I can share. Using your Selective Color (one of my favorites) and Levels layers in Photoshop.
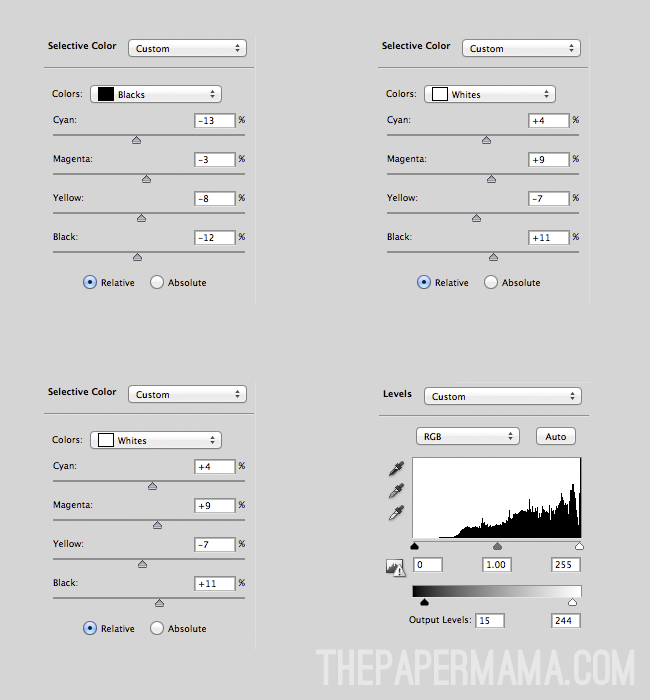
Open up your photo you'd like to edit. Do any basic edits to your photo first (like contrast/brightness). Add a Selective Color layer and play around with the blacks and whites. Below you can see the different selective layer numbers I have for the black and white adjustments. These numbers will be different for you... it all depends on your taste and style.
Once your happy with the coloring you get from your Selective Color layers... add a Levels layer. The only change I will make with this layer is adjusting the output levels. Again, you can see my numbers below. I like just a teeny fog... nothing too intense. Adjust these to your taste as well.
Flatten your photos... and, you're done! Enjoy!


Happy Friday everyone!
- Chelsey, The Paper Mama


Do you know anything about Lightroom? Ive been tryig to figure out how to do the "haze". But LR is so much different than Photoshop.
ReplyDeleteI don't personally know. But, I bet one of the Paper Heart Camera ladies know. :)
DeleteLOVE THIS!! I've never played around with selective color so I just tried it in PS. Amazing... so cool! :-) I'll definitely be playing with this. Thanks for sharing!
ReplyDeleteIt's my favorite. It's great when you have oddly colored photos to edit...
Deletegreat tutorial!! i am excited to try this out... love the vintage haze look! thanks for sharing!
ReplyDeleteYou're welcome!
DeleteLove what it does to the finished product. Brightens just a bit & that feeling that is added is perfection!
ReplyDeleteI love it too.
DeleteReally cool!
ReplyDeleteI totally love this!! That was a fantastic tutorial! Thanks for sharing this!
ReplyDeleteHave a blessed Sunday!