


I am not an html genius... But, this is one thing I've managed to figure out! (go me! :D).
A little note before I start: As far as I know this only works for Blogger. I have no idea how it would work on Wordpress. Also, make sure you have your template and layout completely decided on and saved from the template designer before you widen... each time you change and save anything layout changes to your blog... it gets rid of any html changes you have made.
So, here's how I widen my blog...
1. Open up your Dashboard in Blogger.
2. Find the blog you want to work on and click on 'Design'.
3. Your 'Page Elements' page will pop up. From there... click 'Edit HTML'. {See Below}
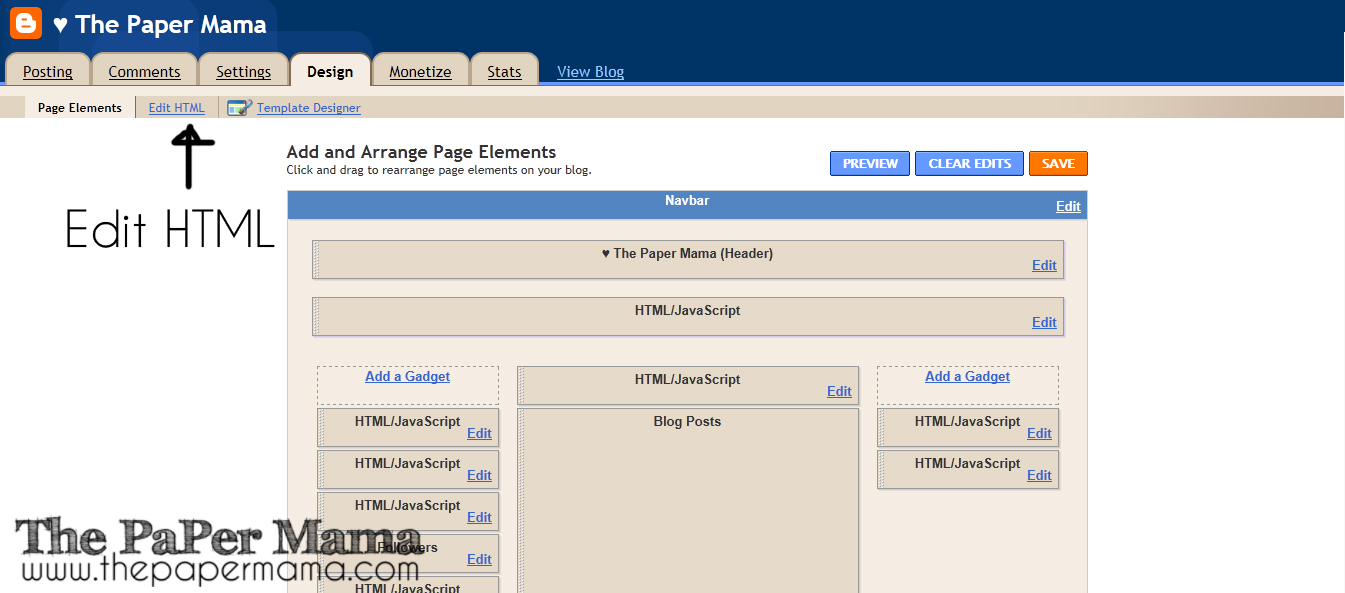 |
| {Click on image for larger view} |
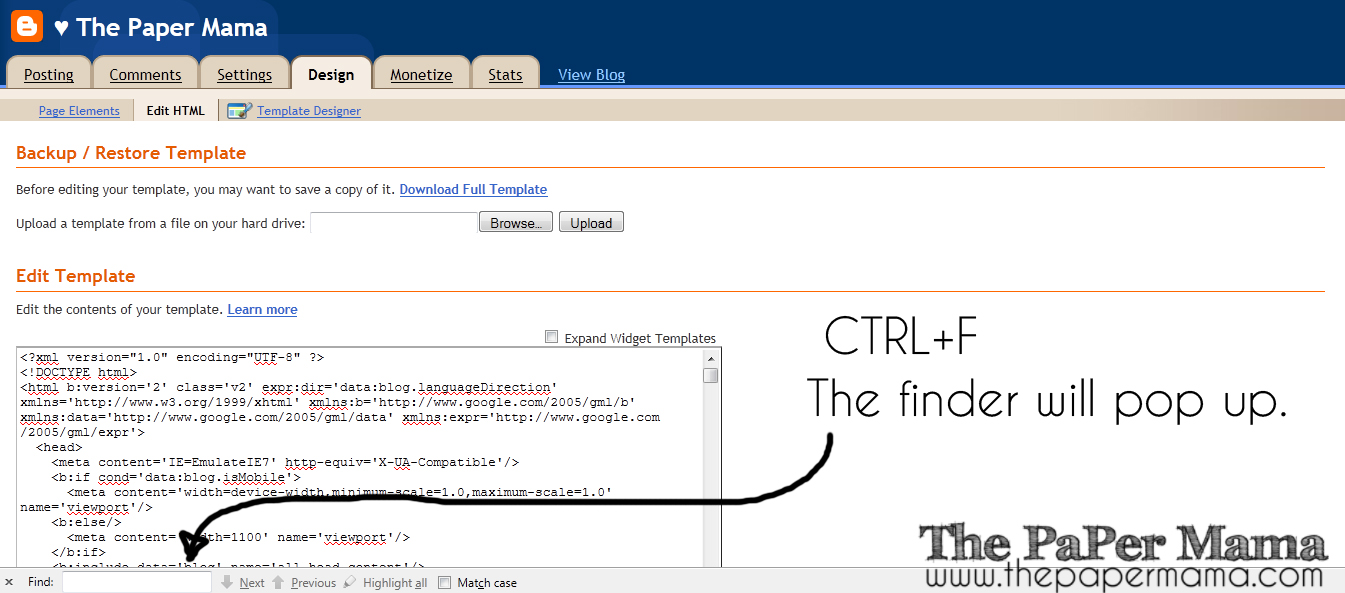
4. Type 'CRTL+f' on your keyboard to make the Finder pop up. {See Below}
 |
| {Click on image for larger view} |
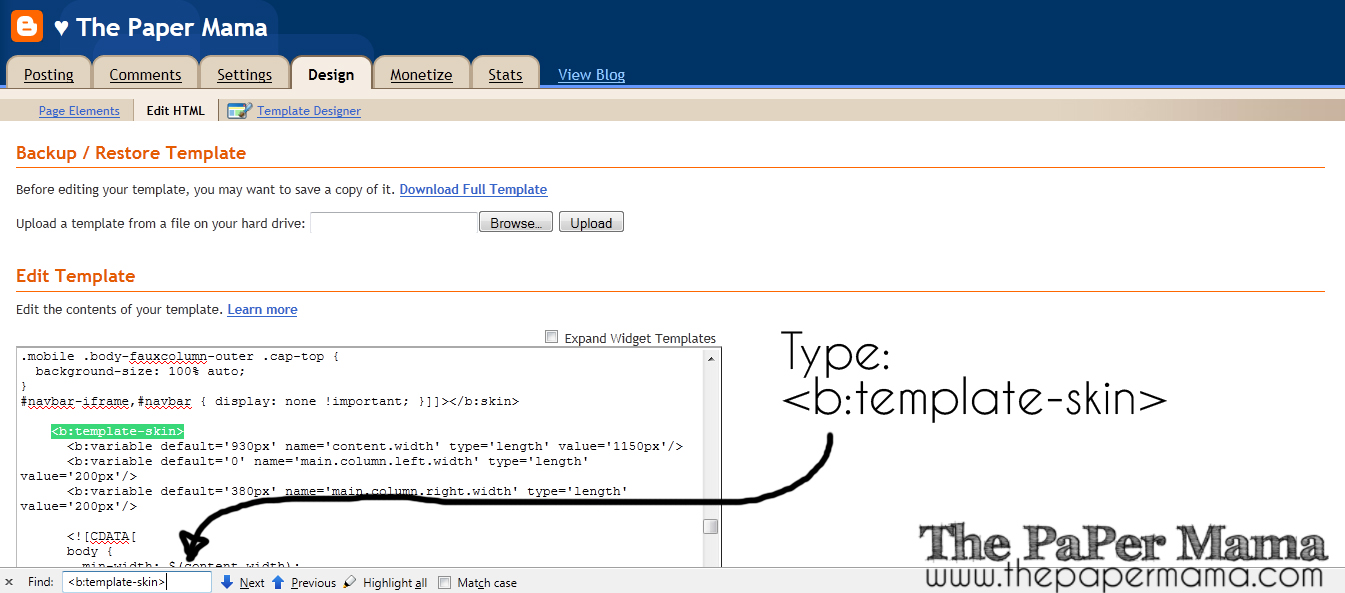
5. Type the code (seen in photo below) into the finder space. {See Below}
 |
| {Click on image for larger view} |
6. That will bring you to the 'skin' section of your blogs html.
 |
| {Click on image for larger view} |
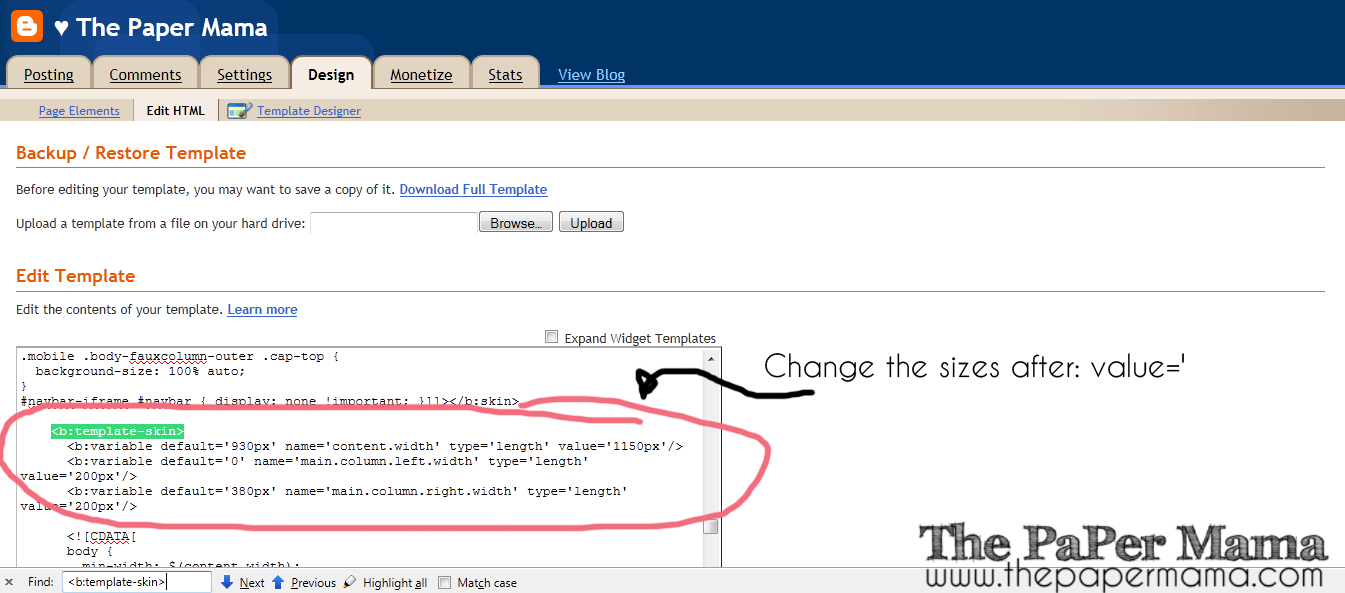
7. You can now change the sizes of your blogs layout and sidebars. Change the sizes after "value='". Usually the first size is the width of you blog. This will change how wide your blog will be. I usually have my Paper Mama blog at 1150. I find that when I go any wider I tend to get complaints about my blog being to large on other computer screens. What I like to do is adjust the size and click the 'Preview' button before I save just to see how things are looking.
The next two sizes are the right and left sidebars (this all depends on the layout you have chosen. I have a sidebar on the left and right side of my Paper Mama blog.). Adjust your sidebar sizes to your liking. Again, I like to click the 'Preview' button before I save. Just to make sure it all fits and looks good.
 |
| {Click on image for larger view} |
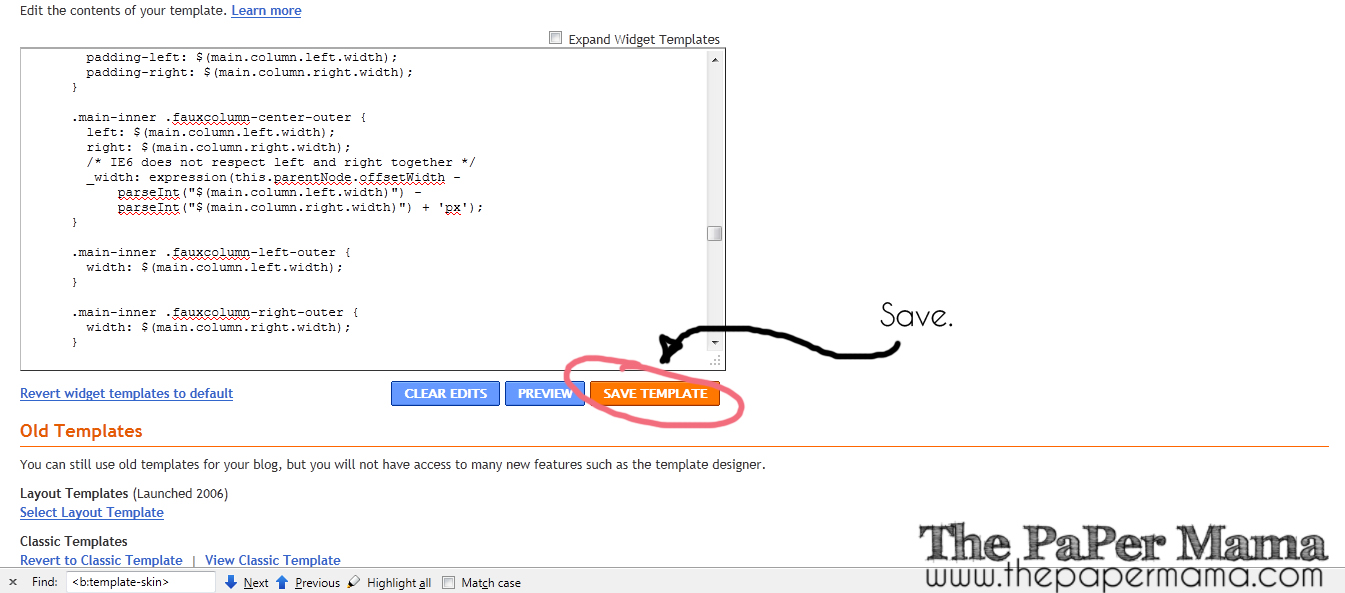
8. After you're happy with the size changes of your blog... click 'Save'. If you decide you don't like how your blog sizes are looking.... just repeat these steps and change the sizes again. It's definitely a trial and error process if you are not that familiar with html... like me. :D
 |
| {Click on image for larger view} |
I hope this helped!

Thanks for posting this!! :D
ReplyDeleteMy hubby wasn't happy when I took out the sidebar - he liked having all the links on the side.
Now I get to keep my bigger main blog area - which I like - and put the sidebar back! Hubby will be happy. :D
Thanks for the easy solution, love the wider look!
ReplyDeleteThis is really cool. I couldn't do the 'control f' thing though, don't know if it's because i'm on a mac? i just scrolled through until i found the right spot. looks great on the blog so far, thanks a bunch!
ReplyDeleteYAY! Loved this post! I just widened my blog. Thank you!
ReplyDeleteThis was so helpful! Thank you!!!
ReplyDeleteAHHHHHHHHHHH! You are a SAINT!!!! I've been trying to figure this out for like 3 days, LITERALLY! I've spent so much time trying different things to make this work on my blog, and messed up my template so many times (and had to start over), I haven't even put any content up! (I'm changing blog addresses) ha! :) So literally, this post was life changing. Thank you! Thank you!
ReplyDeleteAWESOME!!!!!!!!!!!!!!
ReplyDeletethank you so much for posting this!
ReplyDeleteYou've got NO idea how much you've just helped my Frustration levels!!! Thank You so much!! Love all your blogs!
ReplyDeleteThank you! I followed your instructions and everything worked perfectly! Great tutorial :)
ReplyDeleteYou are my hero. I have been trying to figure this out for so long!
ReplyDeleteDo you happen to know how to make my blog's title bigger? Now that I have widened my blog it isn't the right size :( I am slightly hopeless and can't figure it out!
ReplyDeleteChelsey, thank you so, so much! I've been obsessing and searching and NO ONE had the right answer but YOU!!!
ReplyDeleteI still have to fix my header now to fit my new WIDE blog, but yay!!!
Thank you!
hugs, ali
thank you SO much for this!
ReplyDeletewww.so--hi.blogspot.com
Really great and simple explanation, thanks SO much for posting!
ReplyDeleteI've been wondering how to do this for a long time and you answered my question in a clear way! Thank you so much!
ReplyDeleteFabulous, I kept looking at all these wonderful photo blogs with amazing HUGE photos and wondered how i could show my photos so big. Thank you very much. In answer to Gillian on 8th June, on the Mac you don't have CTRL you use the Apple Icon instead, looks like 4 circles tied together...
ReplyDeleteThank you for this!! I have been looking for these exact answers, but a lot of them are old and I think blogger changed their coding. Thanks so much :)
ReplyDeletePS - blogger now lets you do this within template design (I didn't think to look there first... :))
ReplyDeleteOk, so I did this on my college advice blog, yet the width is still max set to 1500px. The pages themselves are 950, but 1500 pixels still exist, so the sideways scroller exists at the bottom and the blog looks off center! AGH. Help if you can!
ReplyDeleteKeep in mind that CSS on drop down menus or other additions might actually override this hack. On our college advice blog we had this problem, making max width about 1200px when the HTML indicated only 950. Just fixed it though!
ReplyDelete