


Watermarking your photo is a great way to mark photos as your own. I recently found someone using my blog posts as a way to spam people that googled my blog name and wandered to their site (here's my post about it). This is totally why I try to watermark every photo I post on my blog. Well... when I remember... :)
I want to share with you all how I create a brush in photoshop to watermark my photos.
Step 1: Start a new document with a transparent background. The size is up to you. Maybe make the pixel width as wide as the size your photos tend to be. I think I ended up making my watermark brush about 1800 pixels wide...
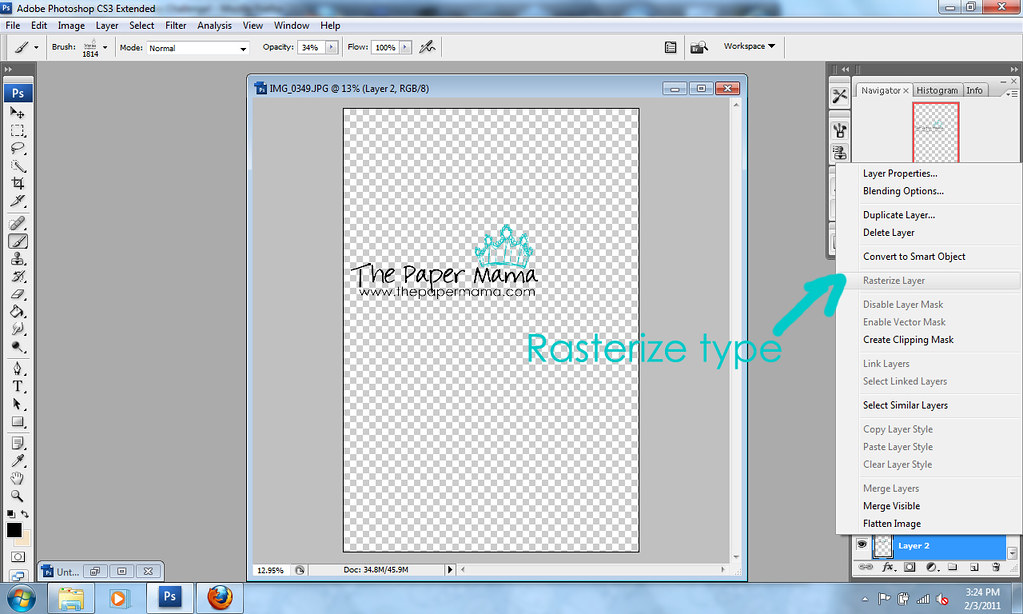
Step 2: Select the "Type Tool". Type up what you'd like your watermark to say. I decided to go with both "The Paper Mama" and "www.thepapermama.com"... then I added a little crown above the "mama". Once you're happy with how your type looks, you'll need to rasterize your type. To rasterize your type, right click on the type layer and choose "Rasterize Type" for each type layer. Once everything is all set up and looking the way you'd like... merge your visible layers.
Step 3: When everything is merged, choose the "Rectangular Marquee Tool". Drag the rectangle around your merged type.

Step 4: With the rectangular marquee around your type, copy it {CTRL+C}. Go to FILE>NEW and start a new project. The new project should automatically be the size of the rectangular marquee shape you've just copied. Open the new project. When it's open paste your copied type {CTRL+V}.

Step 5: Time to turn this type into a brush. Go to Edit>Define Brush Preset. A "Brush Name" window should pop up. Name your brush. I named mine: "Paper Mama Watermark". Press "OK".

Step 6: Your brush should now be in your brushes set. I like to save my brushes from here. Sometimes my Photoshop resets itself... I don't know why, but it does. SO, to save: click on your "Brush Tool". At the top of the page click on the "Brush Preset Picker". You should see a little arrow on the top right. Click it. Your brush options menu will pop open. Go down to "Save Brushes". And save. I have a brush set I've saved as Fave Brushes. I keep all of the brushes I use most often here.
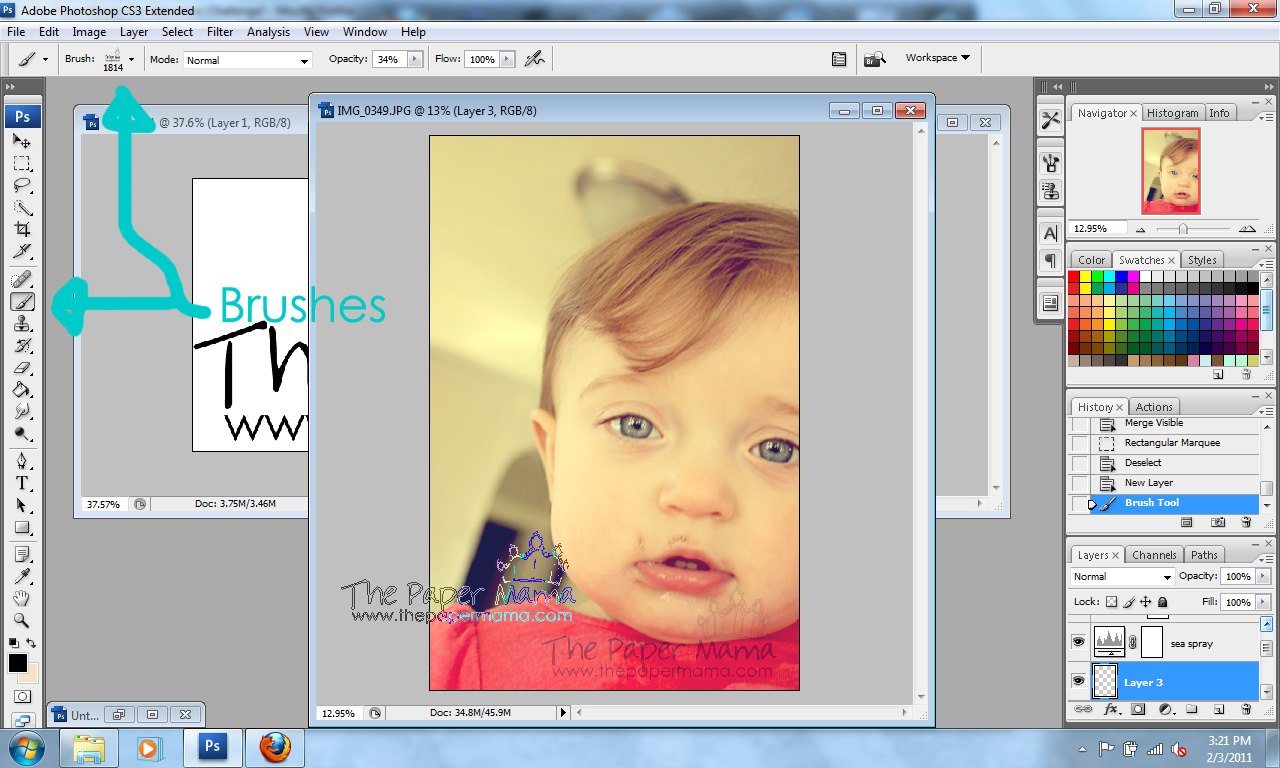
Step 7: Open the photo you'd like to watermark. Select the "Brush Tool" and adjust the opacity of the brush to however transparent you'd like the watermark to be... I went with 34% for this photo. And, that's it!
I hope this tutorial helps! If you're wondering if I re size my photos for the internet: I do. Once the watermark is stamped on my photo I use an action I created to adjust the size of my photo. It merges the layers and re sizes my photos to about 640 pixels. Would you all be interested in a free resizing action?
This tutorial should apply to creating ANY brushes you'd like! Remember my little mustache jpeg? I had turned this into a brush too. :) Try it out for yourself!
Happy Friday everyone! AND, today is the LAST day to enter your Valentine's Photo in the Paper Mama's Valentine's Photo Challenge! Lots of photography lover prizes!!!


People suck. LOL. Thank you! I was seriously just googling this!
ReplyDeleteThank you thank you!! I have wanted to know how to make my own!! I really appreciate this!
ReplyDeleteGreat tutorial! I was wondering how people did this so neatly and consistently!
ReplyDeleteI just made one today, used google to find out how.
ReplyDeleteThanks for this. I've just been over at Madeline Bea's photography site and she has found out that some of the photos of her daughter have been placed on an unfavourable Brazilian website.
ReplyDeleteI'm quite sick of feed scrapers - blogger will give you and others support in this. Chelsey this link has some valuable information.
http://www.gardenbloggers.com/2010/12/reporting-copyright-violations-on.html
Rosie
Why do you resize for the Internet? Also... I use Photoshop Elements 5. Do you know if actions can work in that edition? Thanks!! :)
ReplyDeleteNew Follower here, Great tips!!!
ReplyDeleteHeather @ http://icthroughyou.blogspot.com
Thanks for this! It was very helpful. It's so creepy that people could just be stealing one's photos!
ReplyDeleteOhhhh I have PSE9 and can't figure out how to do it ?? Any tips?
ReplyDelete