Starting September 14th: Paper Heart Camera will be taking over the Bonnie 5'sTouch Up Tuesday's! The lovely Karli is VERY busy with her 3 cute kids and I offered to take it over for her... since I LOVE Touch Up Tuesday's!
I'm really looking forward to it. The last Touch Up Tuesday will be on September 7th over at the Bonnie 5. THEN, get ready for September 14th!
Are you taking part in the 365 project? Share your link here. (Please only link up a blog that is solely dedicated to a 365 project, or link it to your 365 label on your blog or flickr.)
{Step 1} Choose your tree photo. I'd suggest a photo with some varying tree-bark textures and colors (this will help later to confuse the eye into believing it's a real carving). Make sure the photo is already edited to your desired exposure and etc. before starting the carving process.
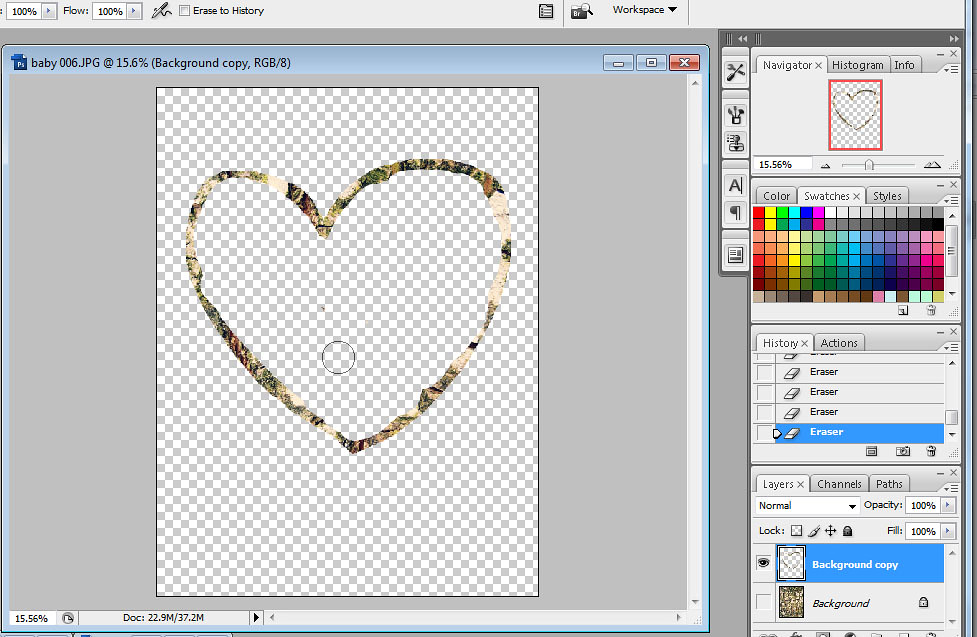
{Step 2} With the original layer selected: make a duplicate copy of your original photo (CTRL+J). Using the Lasso Tool, draw a heart shape (don't worry about the heart being perfect! Remember, a carving on a tree is not perfect!). Invert the heart selection (CTRL+SHIFT+I). Then clear the space around your heart shape (DELETE). Deselect the heart shape (CTRL+D). While on the "background copy" layer, use a smooth edge eraser tool to erase the center of the heart. Don't make the lines perfect, this will add to the carved effect.
{Step 3} You'll notice with both layers open the image looks just the way we started, but we're going to change that. :) Select the "background copy" layer. Adjust the Hue/Saturation of this layer (CTRL+U) to roughly match what the tree looks like under the bark. When you're satisfied with the color, press "ok". You can see below I somewhat matched mine.
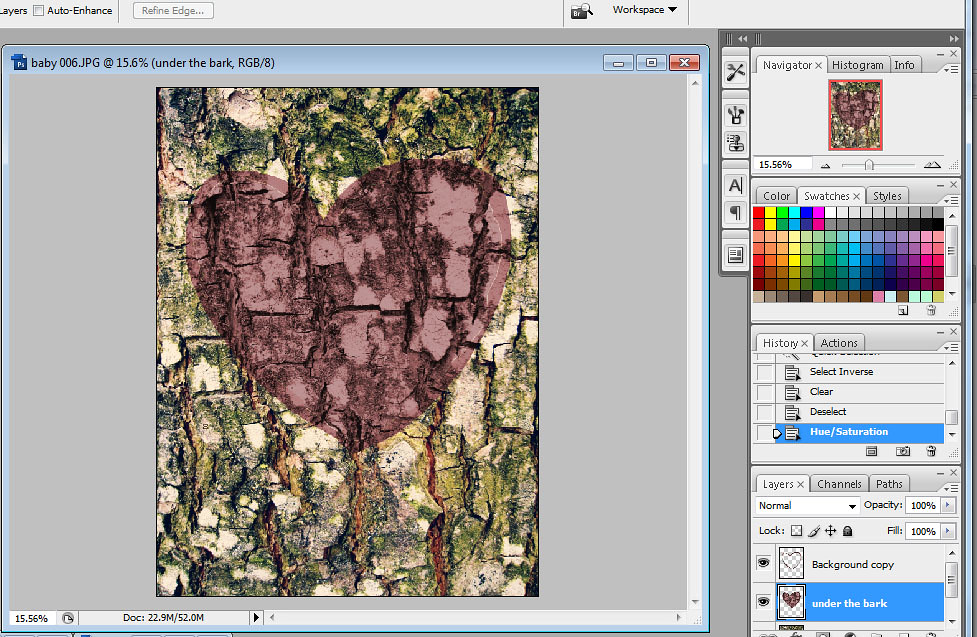
{Step 4} With the original "background" layer selected: duplicate the layer (CTRL+J). Just so things don't get too confusing, I've renamed this new layer, "under the bark". Go back to your "background copy" layer. Using the Magic Wand tool, select the inside of your heart. Click on the new layer, "under the bark" and inverse (CTRL+SHIFT+I) and delete (DELETE). Note: you should now have 3 layers. The middle one will seem invisible against the original "background" layer: time to change that. Now repeat {Step 3} on your new layer, "under the bark" to match what the underneath bark may look like.
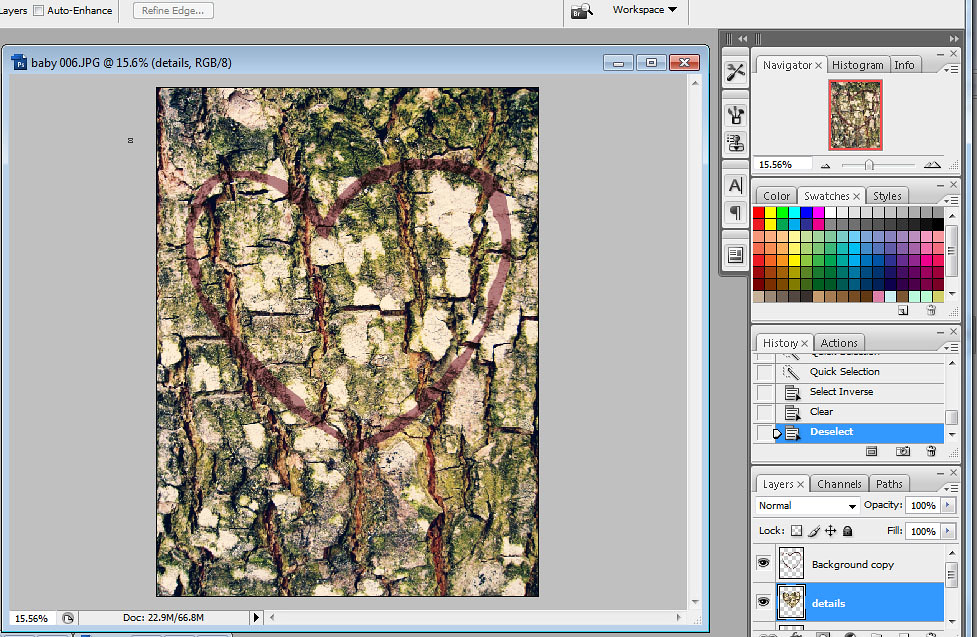
{Step 5} Now, we need to make ANOTHER copy (CTRL+J) of the original, "background" layer. I've renamed this new layer, "Details". Drag and drop the "Details" layer to sit in the middle of the "background copy" and the "under the bark" layers.
{Step 6} Like we did before, we are going to now click on our "background copy" layer, use the Magic Tool wand and select the inside of our heart. Now click on your new "details" layer and invert (CTRL+SHIFT+I) and delete (DELETE).
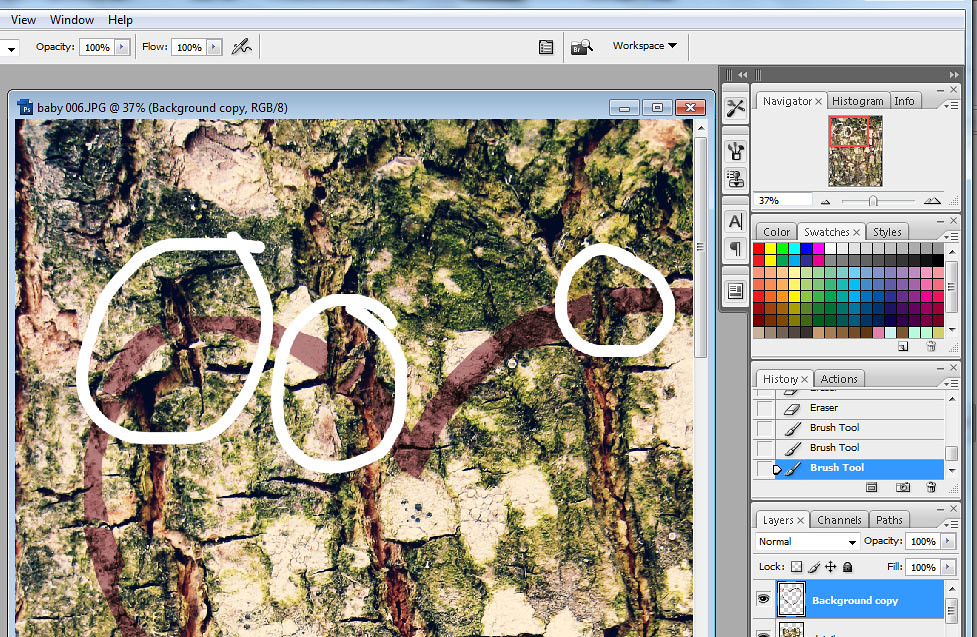
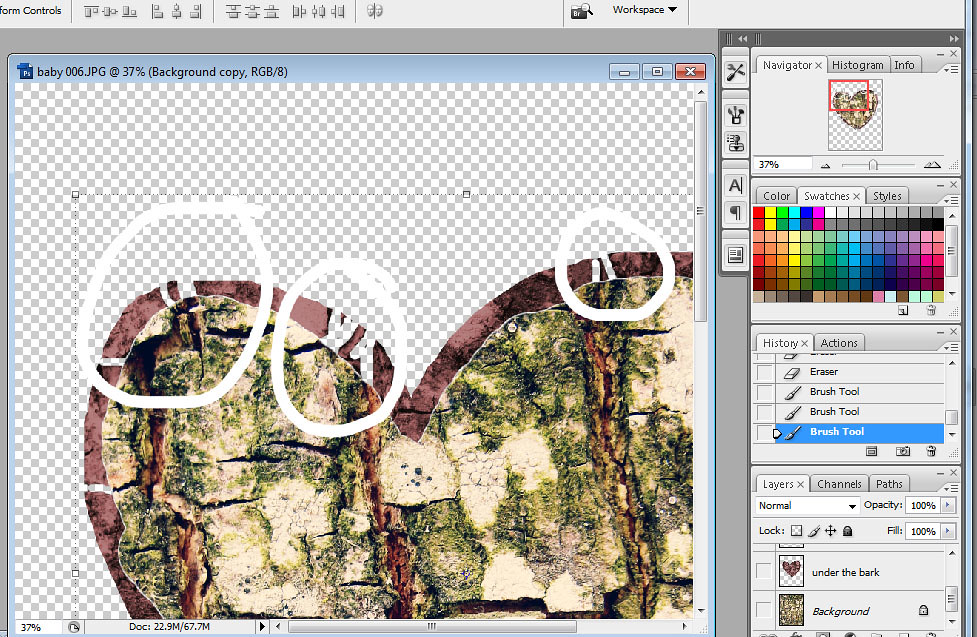
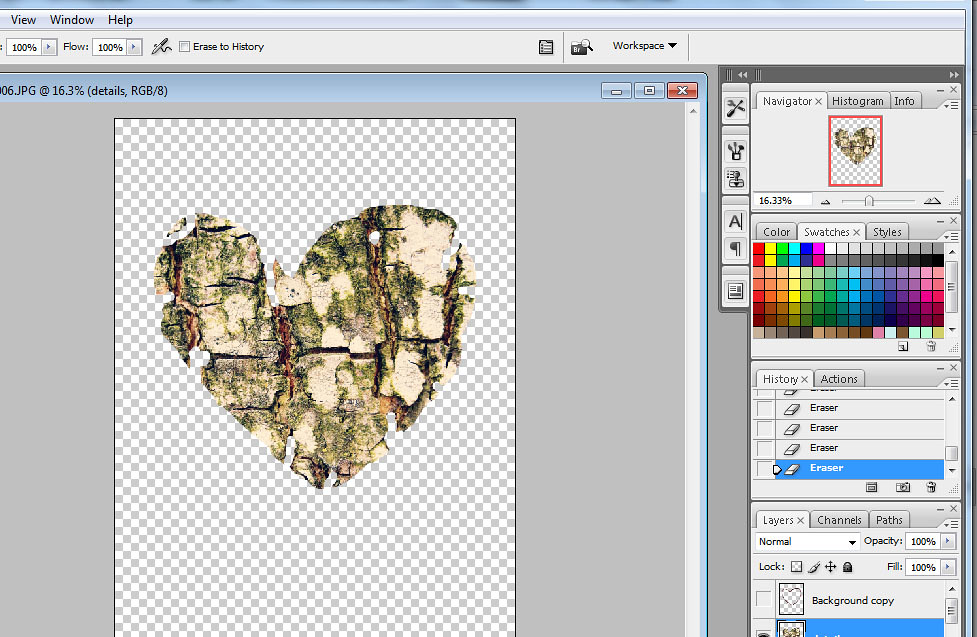
{Step 7} Time to make things look real. I'm going to show you two images below to help (in one I removed the background layer just to show a detail of what we're doing here). Select the "background copy" layer erase any parts of the heart that aren't needed. For example: anywhere there are cracks in the tree, I erased. Imagine you are actually carving the tree. What parts of the tree wouldn't carve with a knife?
{Step 8} This step will be almost the same as {Step 7}. Selecting the "details" layer, erase any parts that you feel will help give the carving a more rugged feel. (I removed the layers in the photo below to show you what I mean).
{Step 9} Duplicate your "background copy" layer. Add a Gaussian Blur (go to filter> blue> Gaussian Blur). You can choose what level you'd like the blur to be. I went with "5"
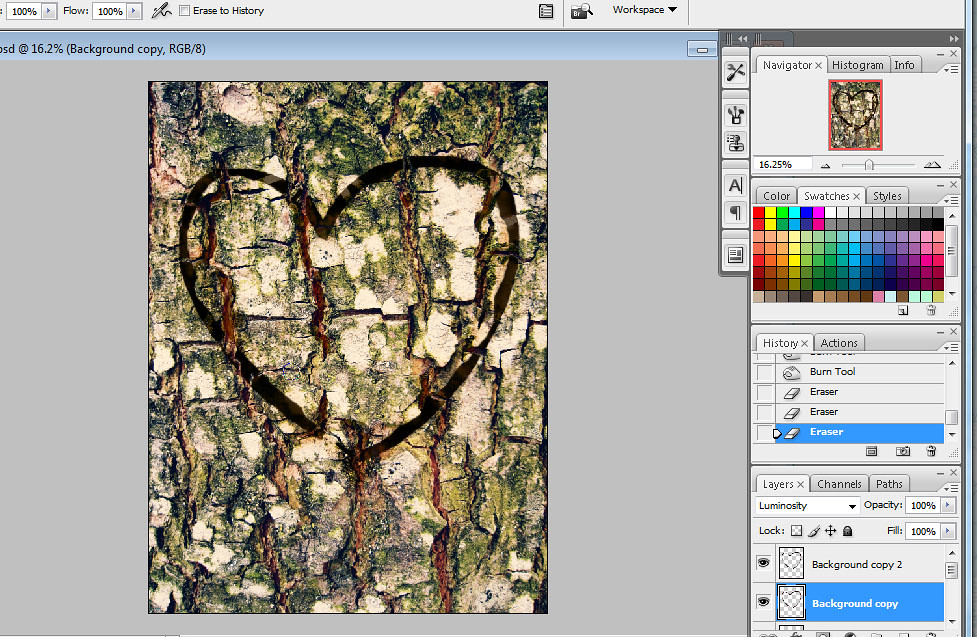
{Step 10} This final step is all about you. You can use the following tools to make the carving look more real. It will all depend on you and your photo. Use the Burn tool to add shadow and the dodge tool to add light. Use the Eraser tool to give a more "real" look. You can even add font for a carved name. Have fun!
If you do use this tutorial, I'd love to see how it turned out for you! You can copy and paste the direct URL to your photo in the comments to you blog post or flickr of the photo you tried this technique on. I would love for you to link to this blog, but you don't have to. :)
I do sell this in my Etsy shop if you'd like to create a custom tree bark carving for you, if you don't want to do it yourself! :)